Animating a Photo Formation with Lego
You need to start by adding a rectangle that will cover the background of the document. Then, from the Fill section of the Inspector, choose Spray and add one Lego piece. I used a "Lego 10" object from the supplied Spray Fill objects.
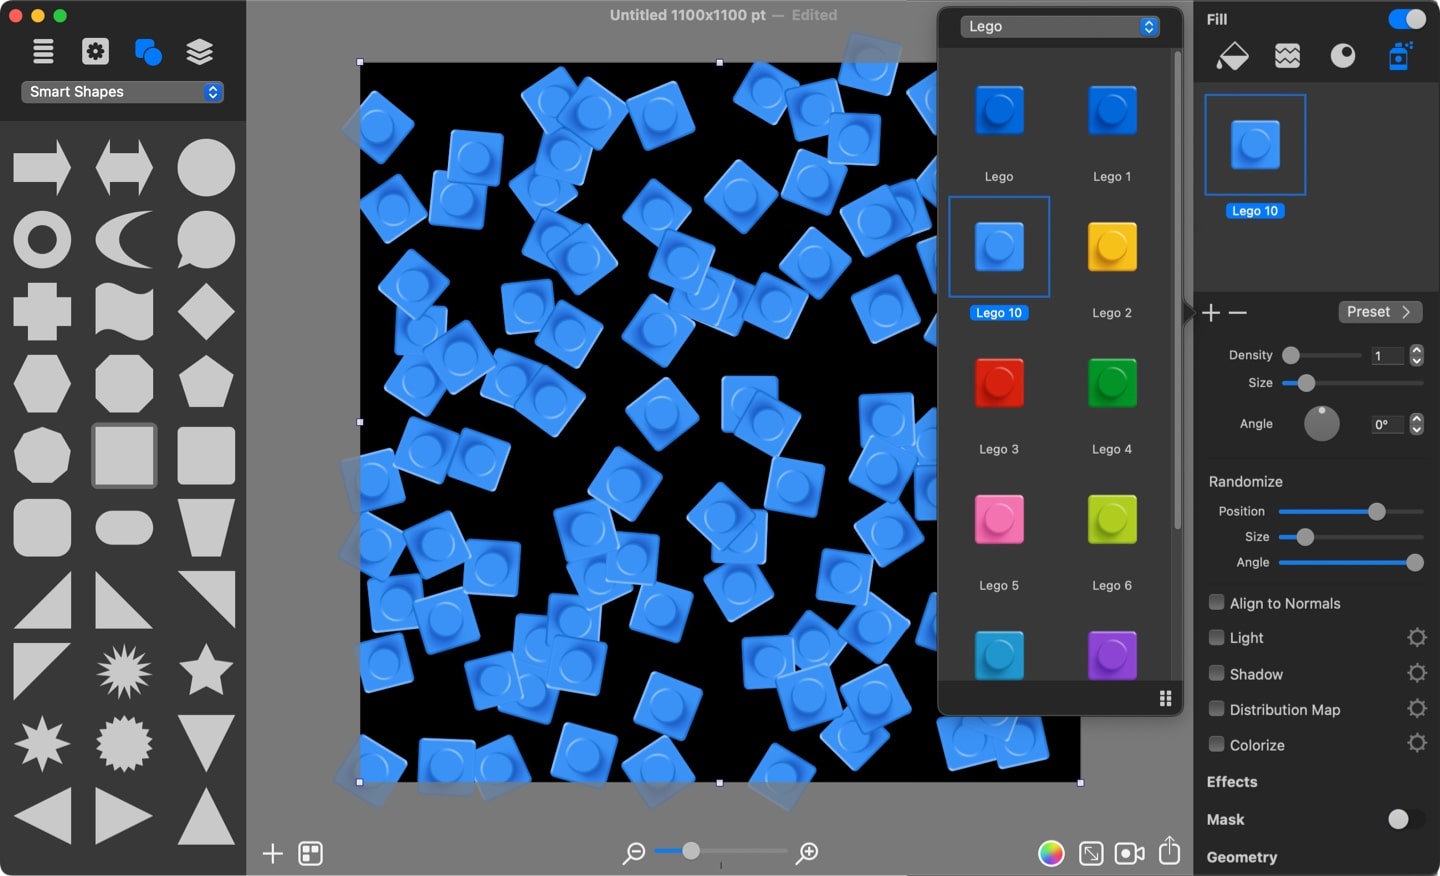
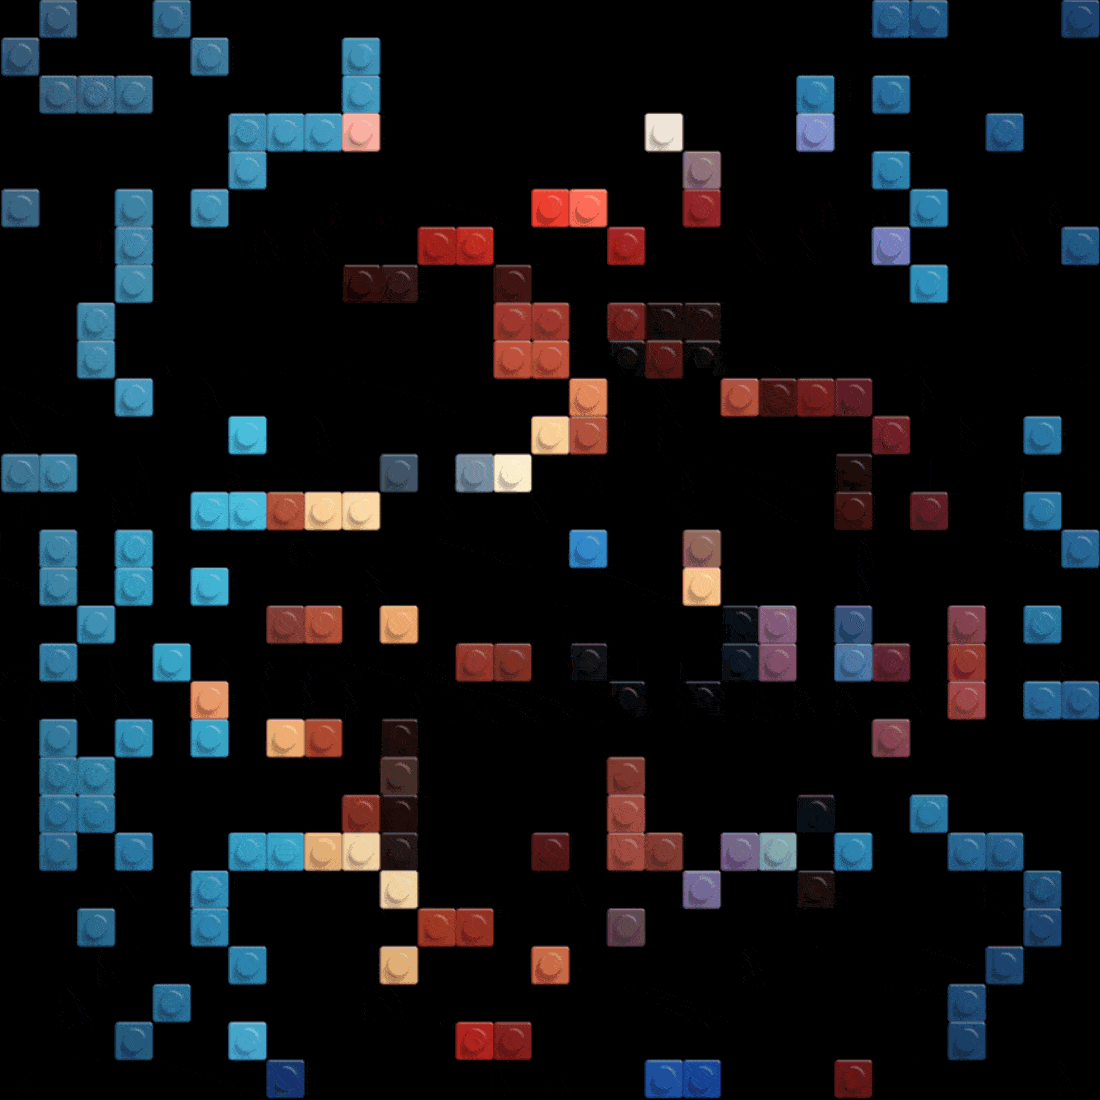
Multiple Lego pieces will populate the rectangle. Pull all three Randomize sliders to the left-most position, so that no randomization will be used. This results in Lego pieces being evenly spread and filling the rectangle.
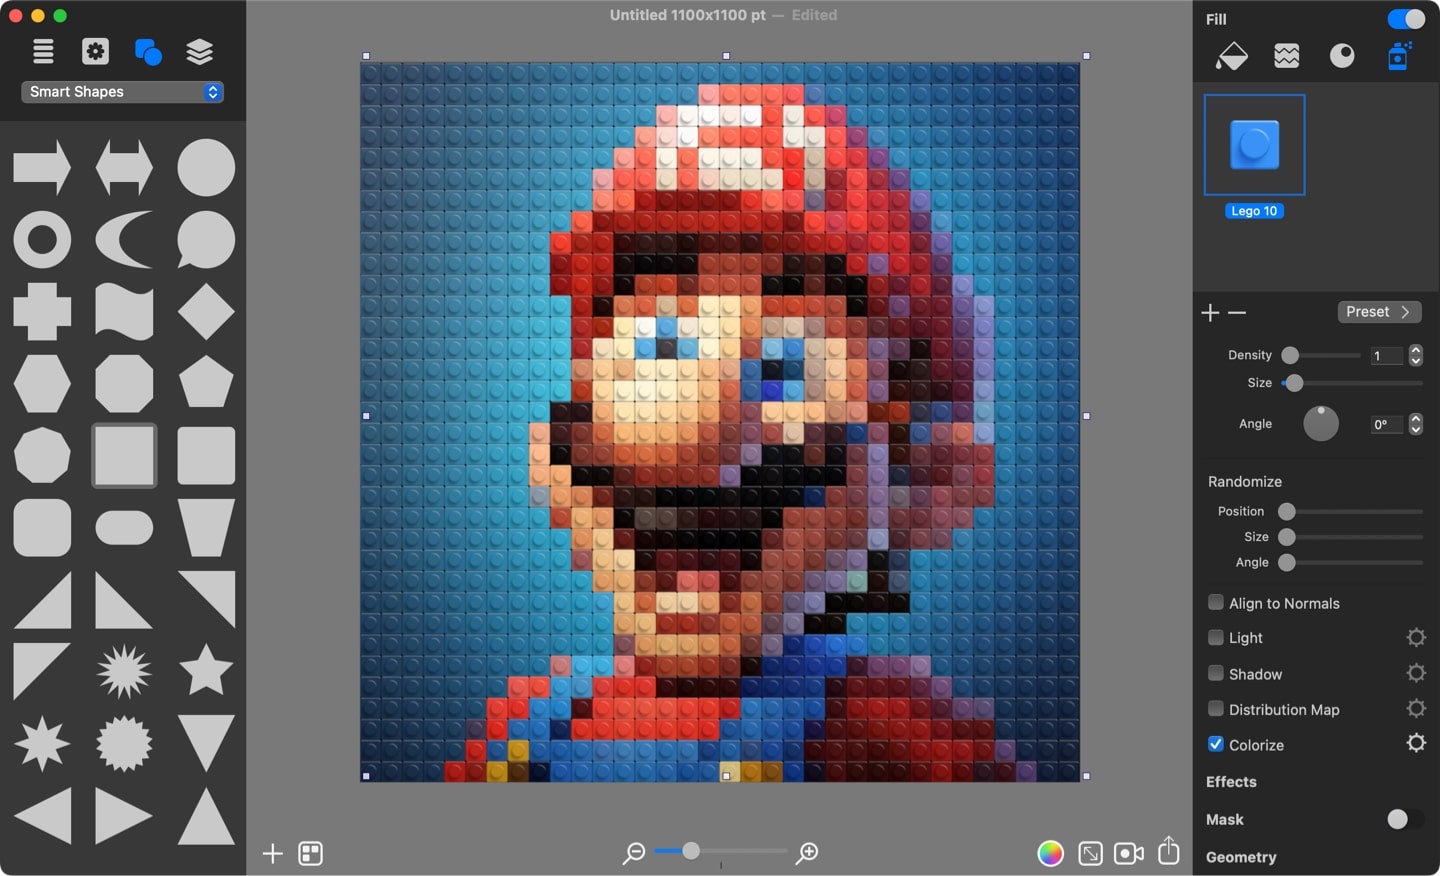
Now it is time to use the Colorize tool. The tool is used to color Spray Fill objects into an image or photo colors.
For this, tick the tool to activate it. Then click the gear icon to change the colorize picture, and use the Custom Folder option to import your own image. I will use a Mario picture for the purpose of this tutorial.
As I reduce the fill objects size, you can more clearly distinguish the original photo.
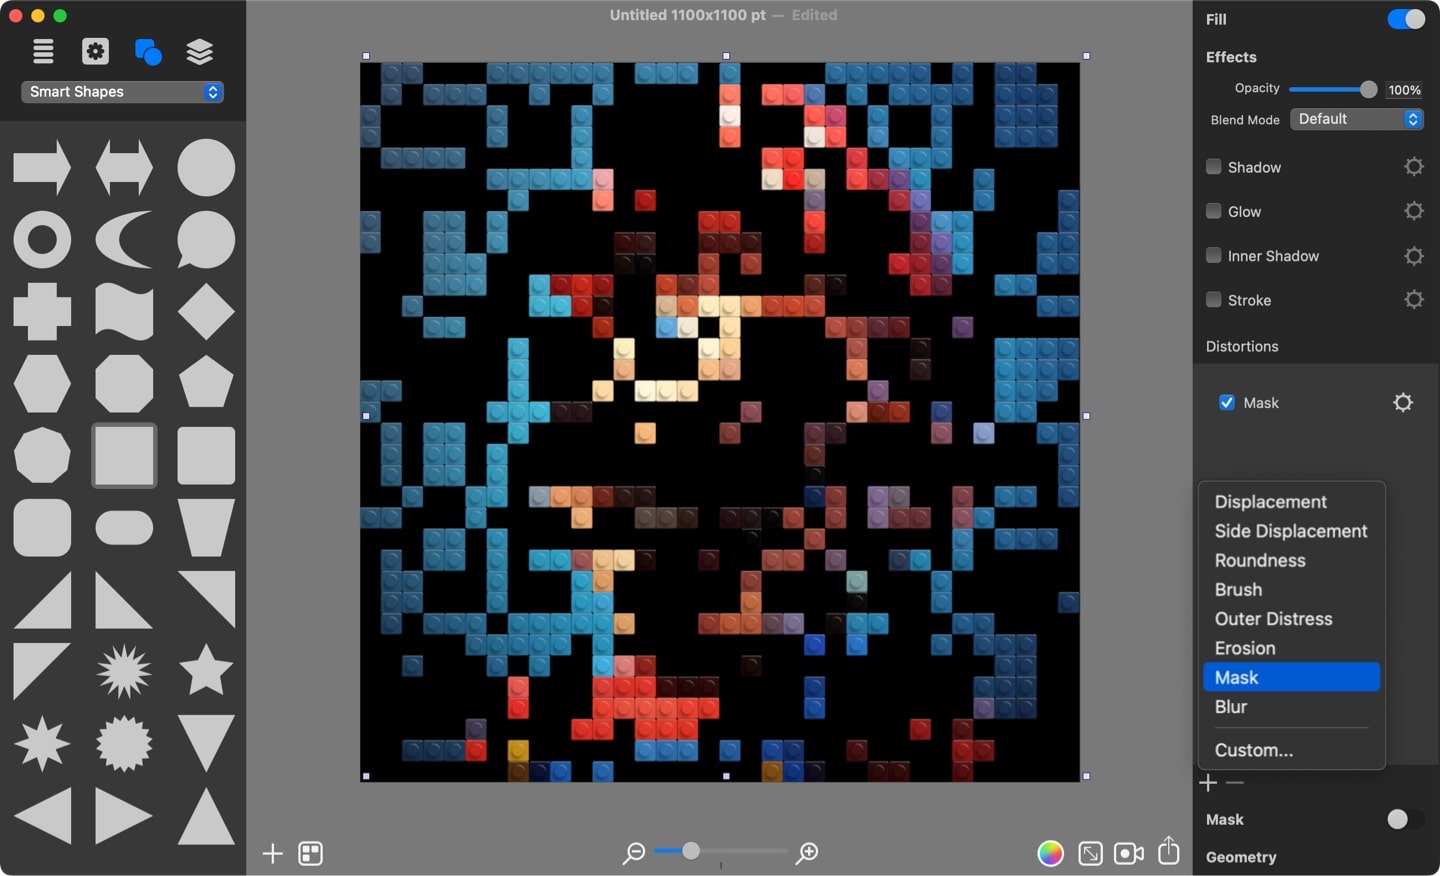
Before proceeding and starting to create animation, I need to create an effect in which the photo is not fully composed with Lego pieces. For this, I add a Mask Distortion (Noise Large 1 from the Masks 2 collection).
Reduce the Mask scale until empty spaces become equal to a single Lego piece. Then, when you pull the Brightness slider to the left, the missing Lego pieces will appear, and, when you pull the slider to the right, they will start to disappear.
Leave the slider to the right position so that the picture looks distorted.
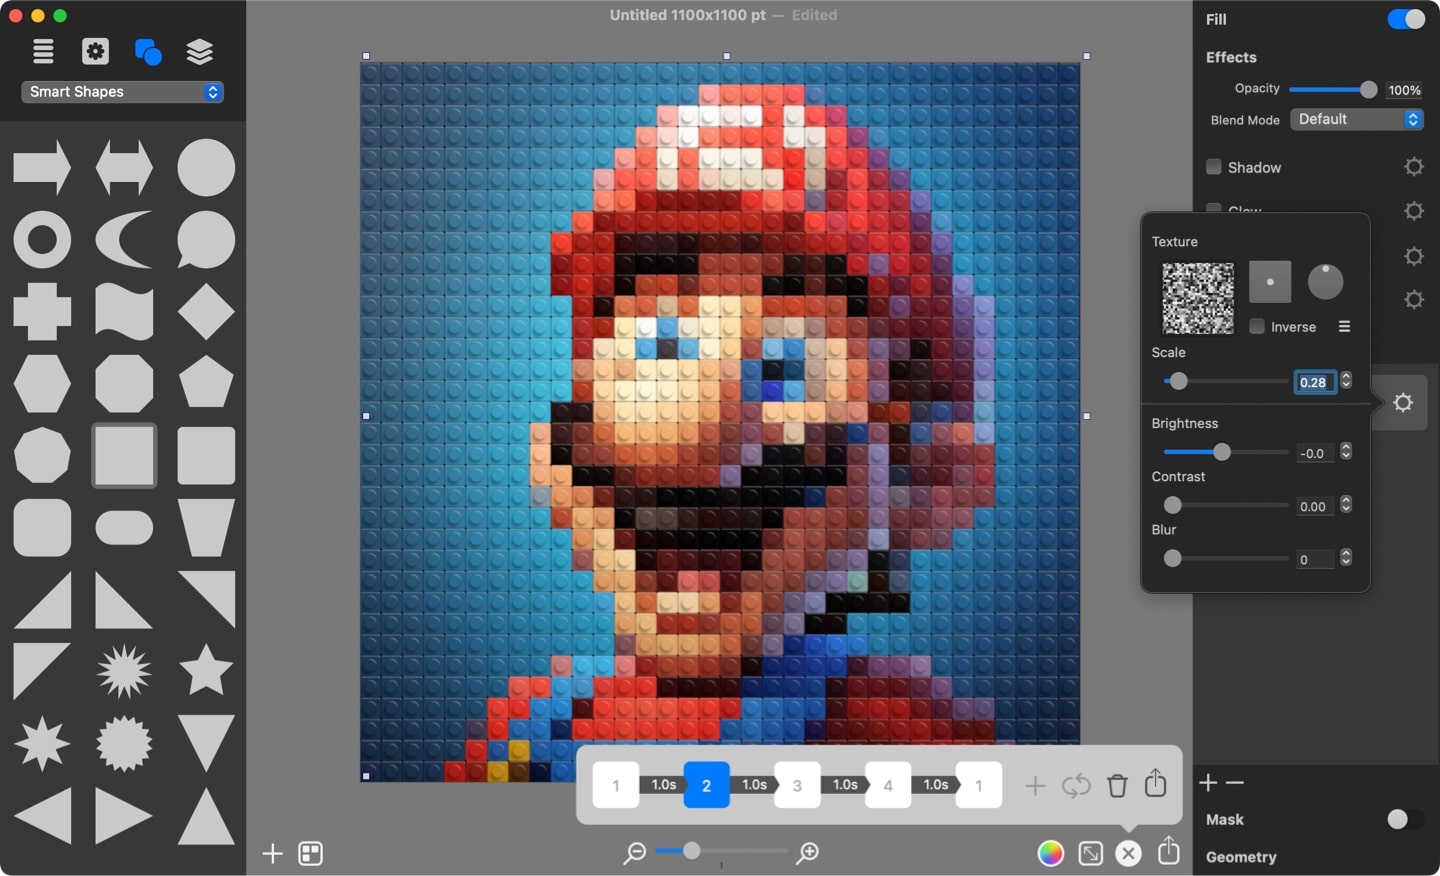
I will record this process of Lego pieces appearing and disappearing in the animation.
First, I need to bring up the Animation panel by clicking the camera icon in the Art Text toolbar. Then click the Plus button to add the first keyframe, which will be the starting point for the animation.
Then add the second keyframe by pressing the Plus button. While the second keyframe is selected, pull the Mask brightness to the left, so that the entire photo is visible once again.
Art Text animation will record a smooth transition that will result in the photo gradually being composed.
Then add the third and fourth keyframes, and pull the brightness slider to the far right and back to the left position, respectively.
In the end, click the Loop button, which will add the final keyframe identical to the first one. This will ensure a perfect video loop.
Once everything is ready, click the Export button and select the format you want to export to─MOV, MP4, M4V or GIF.
That’s it, the animation is ready!
Tip: You can experiment with different keyframe transitions, as well as timing to achieve different ways the photo is formated. I used Linear In-Linear Out for every transition.