Electric Shock Text Animation
This tutorial will guide you through the process of title animation with the electricity flow effect. To ease the creation process for the electric text effect, use the Sonic template from the Movie Titles set.
Creating Text Effect
When you open the template, you will notice two texts with blue and orange electric shock, a blue 3D text subtitle and two light sparkles. You can delete unnecessary elements to have only the Sonic word and blue light sparkle on the edge of the letter O.
The first step would be to change the word to the one you like. For this, select all the layers with the word Sonic and from the text tab of the Inspector, change it to “I GOT THE POWER” written in three lines. You will need to adjust font size, kerning and line spacing to make sure that the word length in each line looks the same.
The light sparkle will likely float off the letter edge as you change the text. So, drag it to the lower left corner of the letter H foot in the word THE. Now you are done with preparing the electric text effect that will be animated in the next steps.
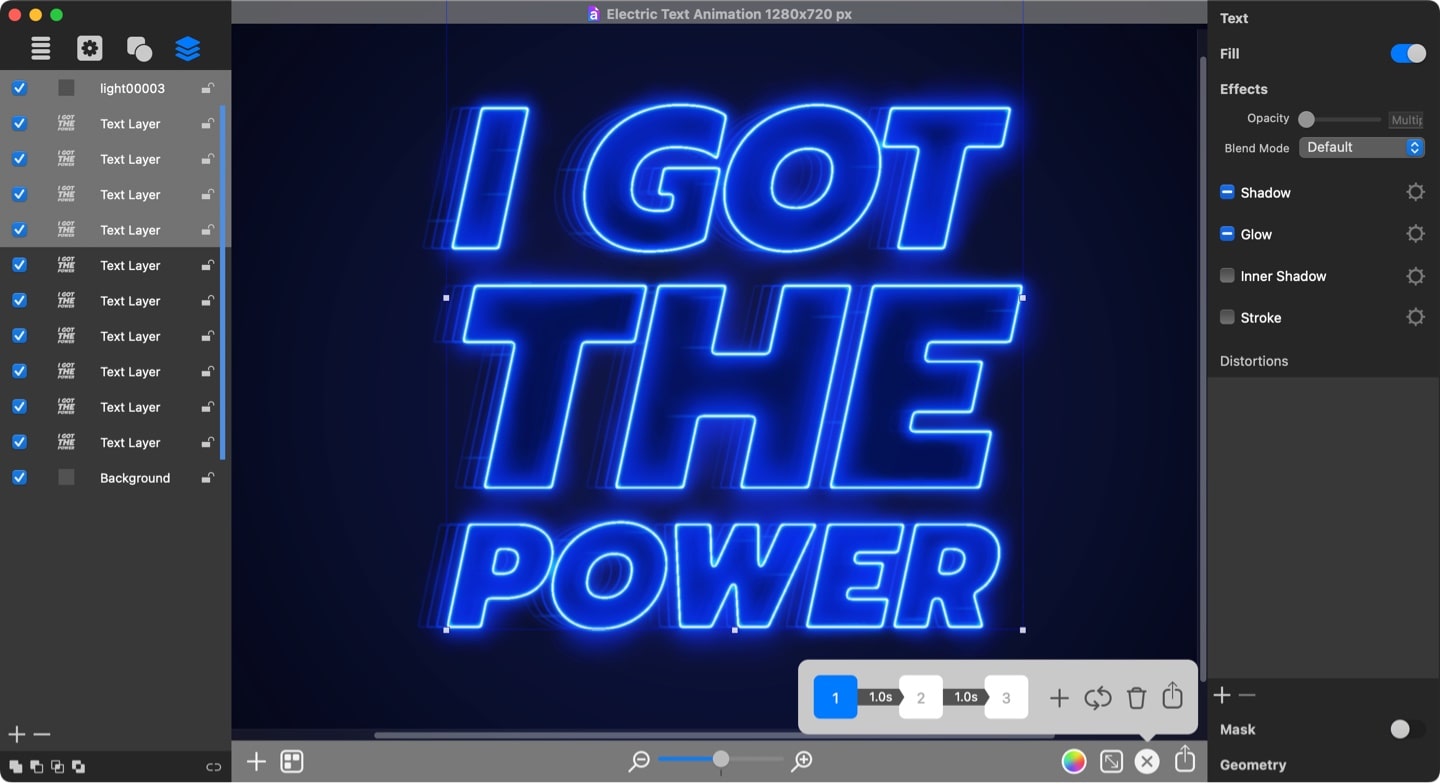
Adding the First Keyframe
Now you can bring up the animation panel and add the first keyframe. While the first keyframe is selected, open the Layers panel and select the top four layers, one light sparkle and three text layers. Pull the Opacity slider to the left-most position in the Effects tab of the Inspector panel to make these layers invisible.
The Second Keyframe Properties
After that, you can add the second keyframe in which you need to make the same four layers visible again by pulling the opacity slider to the right-most position.
In addition to that, you will need to shift the electricity effect along the text. For this, adjust the X-axis texture position for Mask and Displacement distortions for all of the top three text layers.
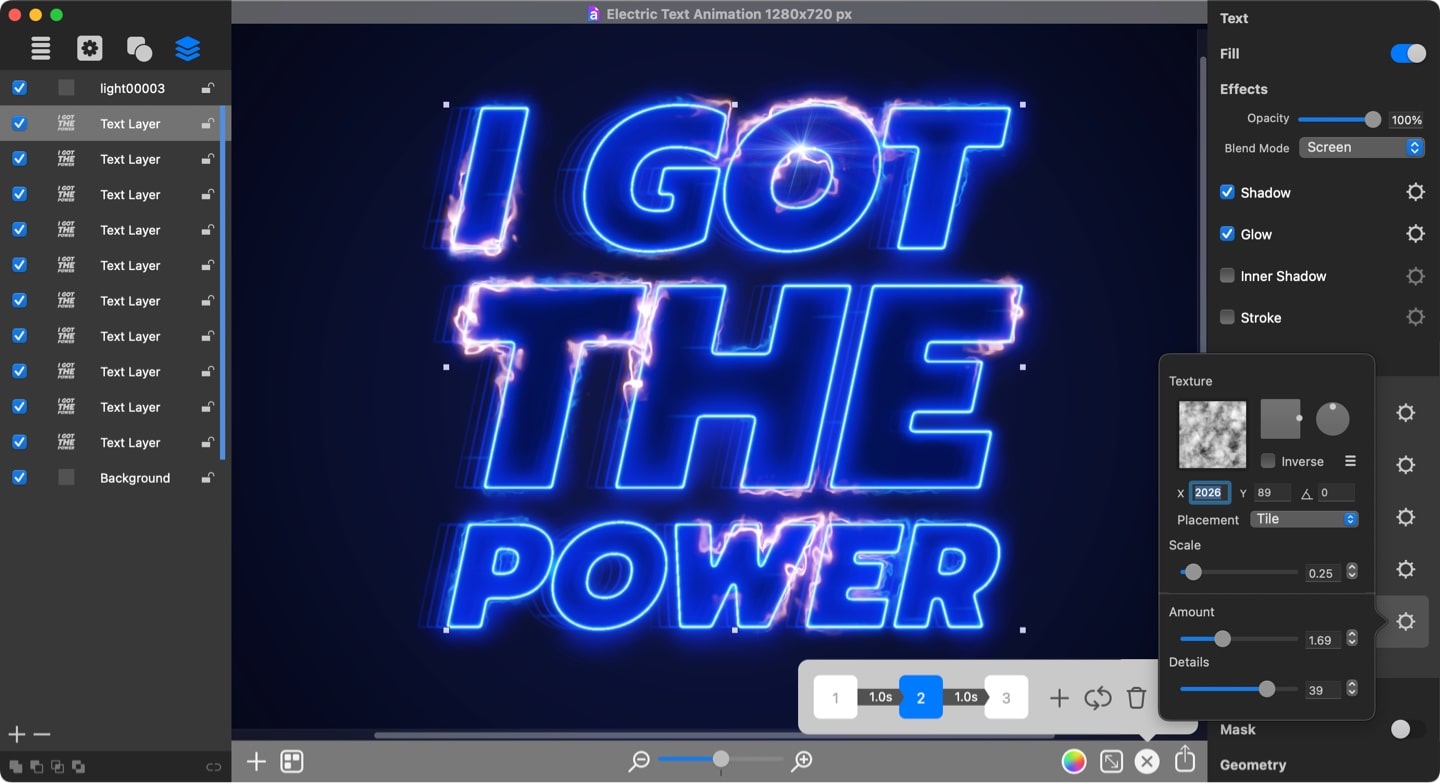
Layer 1:
- Mask X value: 1120
- Displacement X value: 2026
Layer 2:
- Mask X value: 753
- Displacement X value: 2115
Layer 3:
- Mask X value: 781
- Displacement X value: 1951
Also, you will have to move the light sparkle to the right along the bottom line of the letter H foot, somewhere in the middle. As a result, the animation will display the light slowly starting to glow due to increased opacity and sliding to the right.
Finalizing and Exporting Text Animation
This will be your final keyframe. Add it and set the opacity for the top four layers back to 0%.
Similar to the keyframe 2 steps, further adjust the X-axis texture position for Mask and Displacement distortions for the top three text layers.
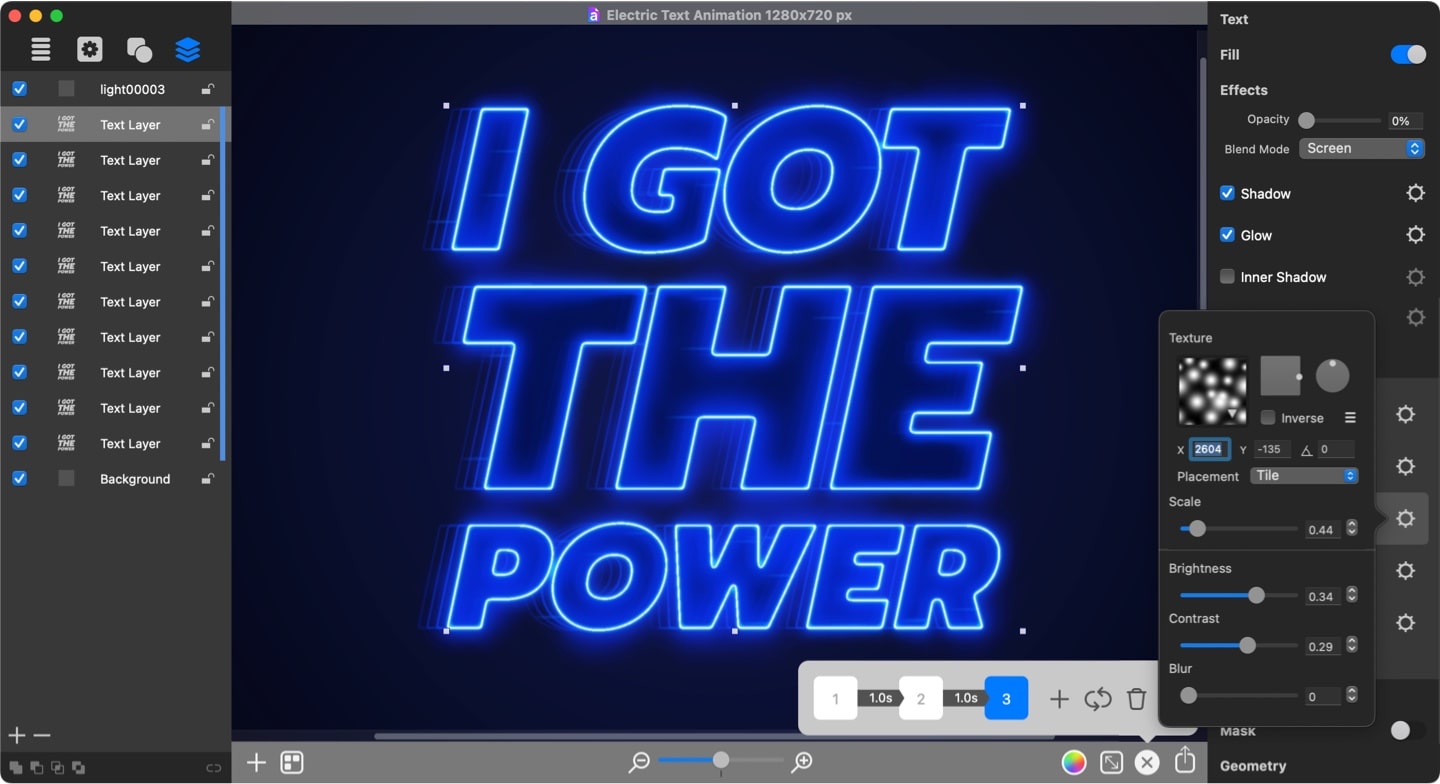
Layer 1:
- Mask X value: 2604
- Displacement X value: -59
Layer 2:
- Mask X value: 2567
- Displacement X value: -230
Layer 3:
- Mask X value: 2129
- Displacement X value: 11336
And move the light sparkle further to the right so it stays at the right end of the H letter foot.
You can preserve Linear In–Linear Out transition type and duration to 1 second and export the animation.