LEGO Bricks Text Effect
Lego bricks are probably the most popular creative kit for all ages. The first Lego bricks were manufactured in Denmark back in 1947. Since then, Lego pieces have evolved a lot, allowing you to build models of famous cars, popular movie scenes and even entire cities.
The popularity of Lego bricks gave rise to Lego typography, in which Lego pieces are used to lay out letters and words.
The Art Text app can quickly create Lego bricks typography graphics using the Spray Fill feature. In this tutorial, you will learn how to design Lego text graphics using the Spray Fill feature that forms a word by spreading Lego pieces over the letters.
The Spray Fill feature in Art Text lets you compose letters and words using a multitude of objects. The program uses photo objects and normals maps to create a text effect in which the spread on items forms a text. You can use fill objects provided with the software or import your own.
Let’s try to design a lego bricks typography using Art Text 4 for Mac.
Create a 2D Text
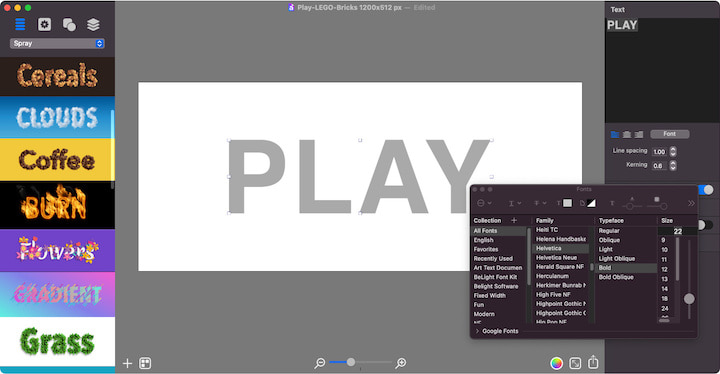
Let’s begin with Art Text by adding a text and customizing its font. For this, go to the Layers menu, click Add 2D Text, or use the Command+Shift+L shortcut. Then, in the Text tab of the Inspector, type the word PLAY in capital letters, and click on the Font button to select the Helvetica Bold font. And, after that adjust Kerning to 0.6.

Import Lego Content
Spray Fill is about the objects you spread to form a word or a letter. For this Lego text, you will need to import colored Lego bricks via the Custom Folder. Download Lego-bricks.zip and open it to get the Lego-bricks folder.
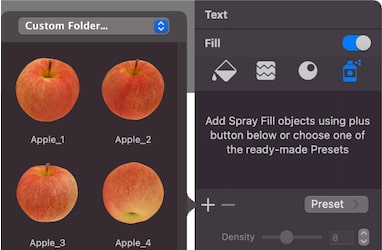
Once you have downloaded the Lego bricks content, use the “+” button in the Spray tab of the Fill section in the Inspector. Then, in the drop-down menu, choose the Custom Folder option and browse to the Lego-bricks folder.
There you will see 19 different Lego pieces that can be used with the Spray Fill tool.

Select Bricks to Use
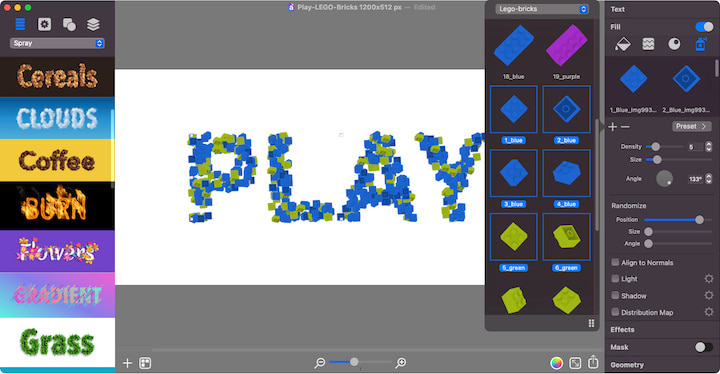
To spread on Lego bricks, you must click on a Lego piece to add it to the Spray window. As you add Lego bricks, they will appear in the text shape. Add brick images in the following order: 1_Blue, 2_Blue, 3_Blue, 4_Blue, 5_Green, 6_Green, 7_Green, 8_Green, 9_Purple, 10_Purple, 11_Purple, 12_Purple, 13_Purple, 14_Green, 15_Green, 16_Blue, 17_Green, 18_Blue, 19_Purple.

Set Up Spray Fill
Now you can see Lego images filling up the text shape. The next step would be customizing how bricks are spread and tuning up Light and Shadow to create a realistic look.
Use these parameters to customize the spread of the Lego pieces:
- Density – 4
- Size — move the slider a little further than the Density slider
- Angle – 133
Randomize:
- Position — set the slider close to the center
- Size — set the slider to the leftmost position
- Angle — set the slider to the leftmost position
Now it’s time to activate Align to Normals, Light and Shadow. After that, adjust Light and Shadow properties by clicking the gear icon.
Light Properties
- Amount — pull the slider ⅘ to the right
- Glossiness — pull the slider ⅓ to the right
- Direction — set it at 1 o’clock
Ambient HSB Sliders:
- Hue – 180°
- Saturation – 0%
- Brightness – 88%
- Opacity – 100%
Diffuse HSB Sliders:
- Hue – 180°
- Saturation – 0%
- Brightness – 100%
- Opacity – 100%
Distortions:
- Hue – 180°
- Saturation – 0%
- Brightness – 75%
- Opacity – 100%
Shadow Properties
- Blur – 5.0
- Distance – 7.8
- Angle – 234°
Color HSB Sliders:
- Hue – 202°
- Saturation – 95%
- Brightness – 44%
- Opacity – 78%
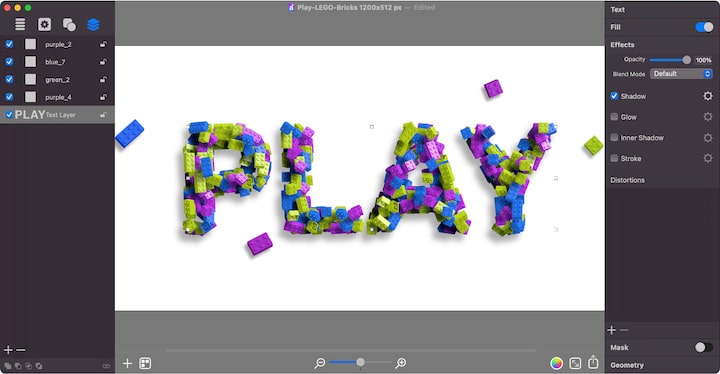
The final touch would be to go to the Effects section of the Inspector and activate the Shadow checkbox with the following parameters:
- Blur – 2.1
- Distance – 6.0
- Angle – 219°

You are all set! Text composed of Lego bricks is ready. You can change the word PLAY to any other and add several single Lego bricks (from the Lego-bricks folder downloaded at the beginning of the tutorial) around the text to create natural bricks spread.