Spread Leaf Typography
In this tutorial, you’ll learn how to combine nature’s beauty with the art of typography. Art Text can help to create text designs infused with autumn leaves.
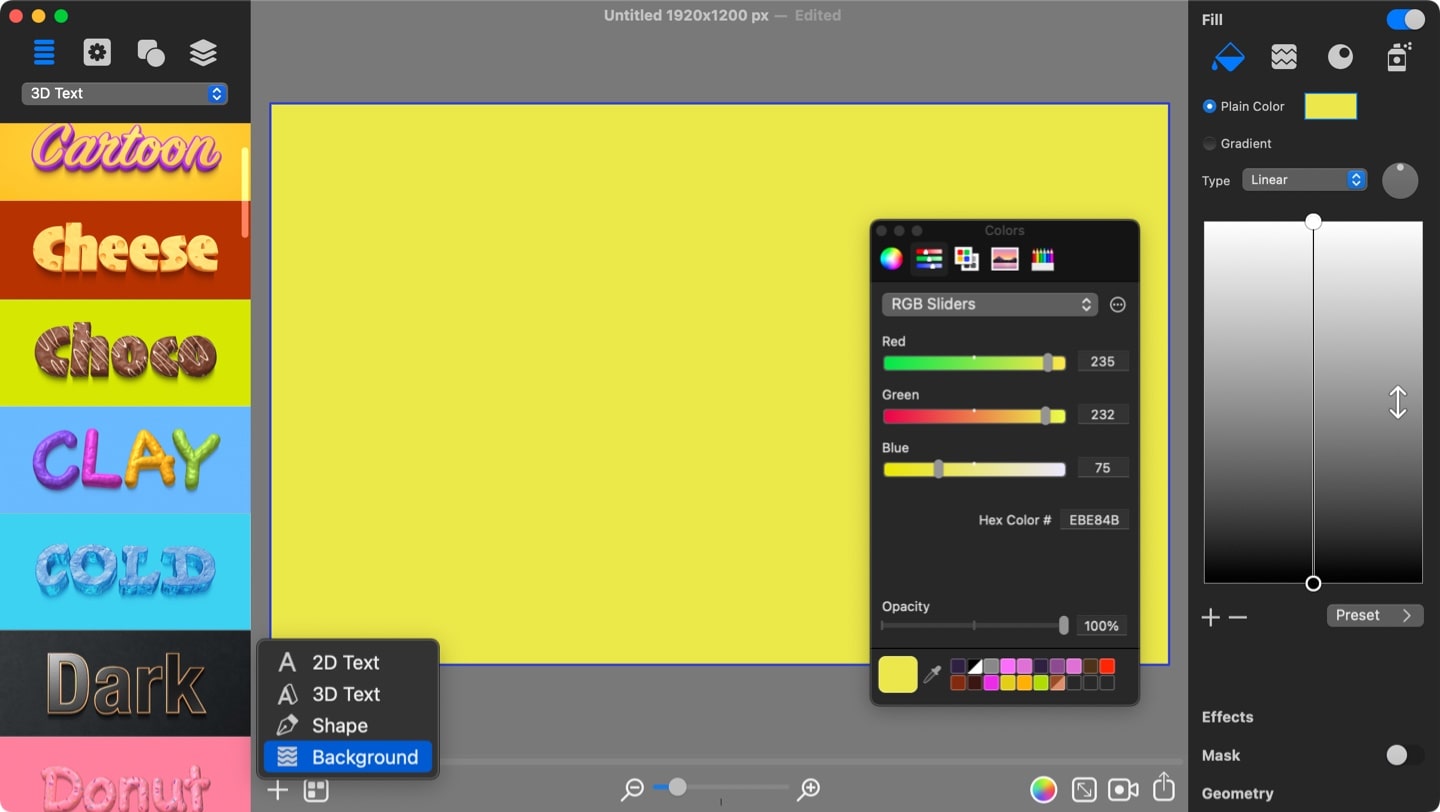
Document Size and Background
Before starting the design process, you need to set up the document size via the Edit > Document Size menu.
Then, add a background using the Layers > Add Background. For the background, use Plain Color Fill with the following values:
- Hex Color: # EBE84B
- Opacity: 100%
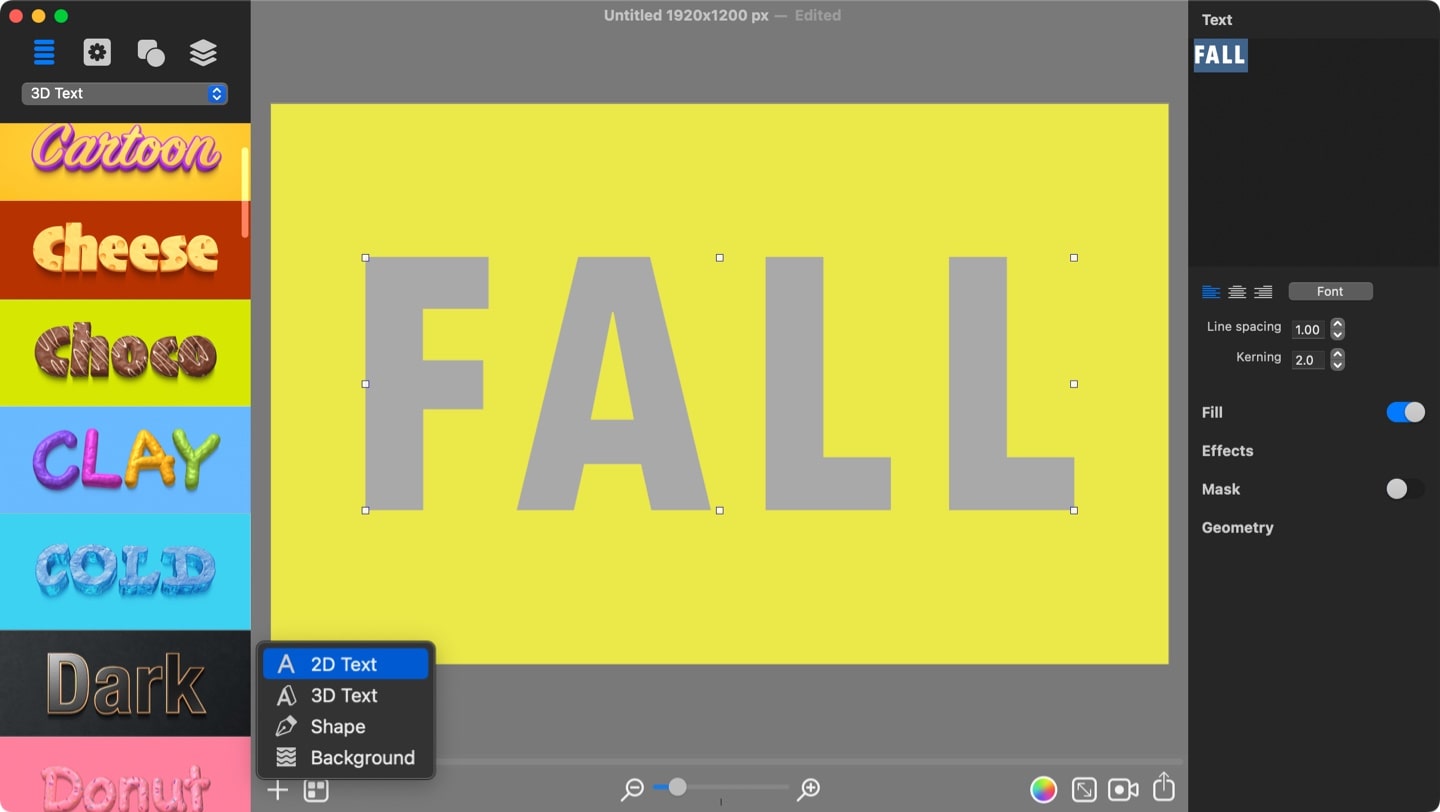
Adding and Customizing the 2D Text
Start the design process by adding a 2D text using the Layers > Add 2D Text menu and type a word. Change the default text to word Fall via the Text tab of the Inspector, then change the font to Avenir Next Condensed and increase Kerning.
In the Geometry tab of the Inspector set Width 1514 and Height 540 for the text.
Filling the Text with Leaves
Now, you can move on to choosing leaves and setting up the Spray Fill parameters to achieve a lovely autumn leaves text effect.
Switch to the Spray Fill in the Fill tab of the Inspector, click on the plus button, and choose the Leaf category. Then click on the leaves that you want your text to be composed with. Here is the list of leaves used in the tutorial example: Leaf 1, Leaf 11, Leaf 12, Leaf 15, Leaf 16, Leaf 17, Leaf 18, Leaf 2, Leaf 21, Leaf 22, Leaf 3, Leaf 4, Leaf 5, Leaf 6, Leaf 8.
Then, move on to adjusting the Spray Fill parameters:
- Density: 13
- Size: leave as is
- Angle: 320°
Randomize section:
- Position: set the slider to almost the most-right position
- Size: leave as is
- Angle: set the slider to almost the most-left position
After that, activate Align to Normals and Shadow options. Then, set the Shadow properties as follows:
- Blur: 4.7
- Distance: 11.8
- Angle: 238
Color parameters:
- Hex Color: # CE6533
- Opacity: 74%

Spreading Leaves on the Background
Spread leaves randomly on the background to make the design more realistic. For this, duplicate the text layer using the File > Duplicate menu.
Then, using the Distortion effect, you can distort the text shape so that the fill looks like leaves spread. Before moving forward with the Distortion effect, hiding the first text layer is recommended. To do this, switch to the Layers tab in the Content Panel and deselect one of the text layers.
Now click on the active text layer to select it. For the duplicate layer, change the following Spray Fill parameters:
- Density: 1
- Randomise Size: move the slider a little further than the middle
- Shadow Blur: 8
Then, in the Effects tab add Displacement Distortion and set the following parameters:
- Scale: 0.12
- Amount: 5
- Details: 24

You can now resize the layer to get leaves to cover more of the background and then enable the second text layer.
Viola, the autumn leaves typography is ready.
Tips:
You can export the design as is into different image formats or opt for exporting with a transparent background.
You can animate leaves typography by changing the spray fill parameters in animation keyframes.