Using Spray Fill
Art Text 4 comes with a large collection of pre-designed templates that use Spray Fill. All of them are easily customizable, and you can also create any design from scratch using this powerful tool. If you want to learn all the possibilities the Spray Fill tool offers and be able to create a unique design in 8 easy steps, continue reading this article.
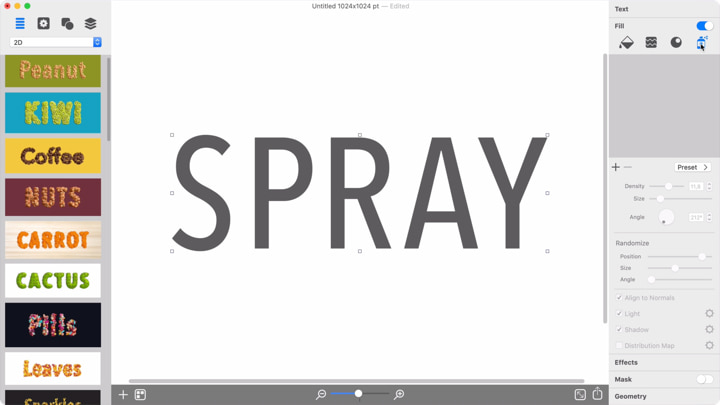
Start a New Blank Document
The Design Gallery in Art Text offers pre-designed templates and an option to open a new blank document. New blank document is a default 2D text that you can change to any word you want to spray fill. Note that Spray Fill equally works with text and shapes from the Shapes library or imported vector shapes.
Select Items
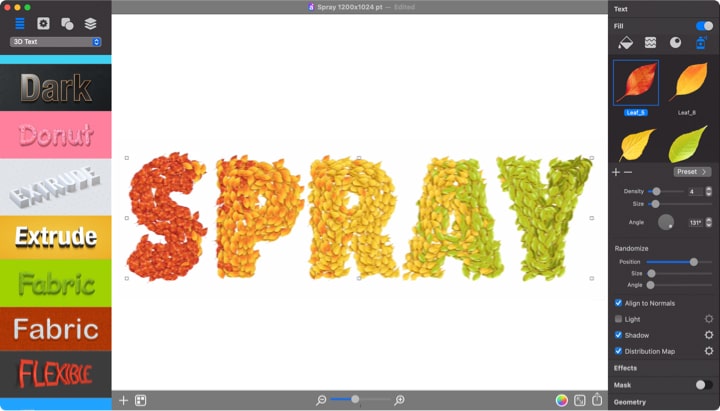
To apply and customize the Spray effect, open the Fill section of the Inspector and choose Spray. This section offers a number of default presets and a library of fill items, such as coffee beans and leaves. These items are grouped into categories. The presets are created using items from the library.
To fill your text or object, you can either open the popup menu with presets or choose single items via the “+” symbol. When you add single fill objects from the library, blue frames indicate already added items. You can also upload your own spray fill objects and create a custom preset.

Adjust Density, Size and Angle
The Density setting is a quantitative parameter that defines how many items populate the shape. You can leave gaps between items or make them overlap.
The Size slider adjusts the size of the objects that populate your shape. If items have different sizes, this control enlarges all items proportionally.
The Angle slider rotates all of the items by the same angle. This angle will serve as the median if the Angle slider in the Randomize section is not in the leftmost position.
Decide Whether You Want to Use the Distribution Map
The Distribution Map is an outstanding feature within Spray fill. This feature reduces the randomness of how items of different types are located by arranging them in a particular way. The arrangement is based on two factors: the order of items in the Inspector and the settings that define the mapping principle.
The order of items in the Inspector is simply the order in which they were added to the list. So, to reorder items, you need to remove them and then add them in the desired order. The settings of the distribution map can be accessed by clicking on the corresponding gear icon in the Inspector.
There are two major mapping options: Shape Based and Texture.
The Shape Based effect resembles a circular gradient. The items of the first type are distributed along the object’s edge in the shape of a ring. The items of the second type are distributed along a smaller ring, and so on. The middle of the object is taken by the last item type in the list.
This option has two settings:
- The Scale parameter is used to set the amount of space taken by one of the distributed items.
- The Position control lets you move the center of the item’s distribution.
When using the Texture option, items are distributed based on a mask─different items go into a different color zone of the mask. In order to choose a new texture, click on the thumbnail of the current texture or choose Custom Folder, and select a graphic file for your texture on your computer.
Settings of the Texture:
- The circular control to the right from the thumbnail is used to rotate the texture.
- The square control defines the offset of the texture in relation to the object’s center.
- Using the Placement drop-down menu, you can select how the texture should fit the object. Imagine that the object in your document is of a rectangular shape, but the texture is a square. Since one doesn’t fit into the other exactly, you can select Stretch and allow the texture to be deformed. Or, you can choose Tile to preserve the aspect ratio of the texture but allow tiling.
- The Scale slider works only when Tile is selected. This slider changes the size of the texture so that you can fit one or multiple copies of the texture to the object.
Choose Whether to Align to Normals
The Align to Normals checkbox lets you choose an alternative way to set angles of items in your artwork. To see the maximum effect of this option, you should turn off the randomization of the angle (move the Angle slider in the Randomize section all the way to the left). Also, the items should be thin and long. When Align to Normals is activated, items become oriented off the middle toward the outside of the object. They may resemble cactus spines or fur.
Note that actual graphics in the images can have a certain rotation angle by default. For instance, most of the leaves in the library are rotated by about 45 degrees. This means that you may need to adjust the Angle after enabling Align to Normals.
You can also adjust the angle in order to make items follow the direction of the object’s outline, which will make the object’s shape more readable.
Adjust Randomization
The Randomize feature helps you to achieve maximum discrepancy in size, position and rotation of fill objects. This feature has several settings:
- The Position slider defines the randomness of the items’ location. The far left state of this control places items in rows and columns. The further to the right you move the slider, the more random location items will have.
- The Size slider allows you to apply random sizes to different items. Items will have the same size at the far left position of the slider. If you move the slider to the right, some items will decrease in size.
- The Angle slider allows you to rotate items by random angles. Items will have the same orientation at the far left position of the slider. If you move the slider to the right, items will get random positive or negative deviations from the original angle. The position of the slider will define the maximum deviation angle.
Adjust Light
Light settings are very useful to choose the way fill items are lit, as well as to set up an object’s glossiness. Lighting can completely alter the way the object looks. The Light checkbox adds a light spot with the possibility to adjust light direction and other properties:
- The Amount parameter lets you adjust the strength of the effect.
- The Glossiness slider changes the size of the light spot reflex. Glossier objects have smaller but brighter light spots.
- The Direction control moves the light spot around, changing the position of an imaginary light source.
- The Ambient color defines the object’s color in the deep shadow. It can be dark gray.
- The Diffuse color defines the object’s color under diffuse light. In many cases, it coincides with the natural color of the object.
- The Specular color is used to define the color of the reflecting light.
- Note that some images in the library include light and shadow properties. Consequently, there is no need to activate the Light and Shadow options for them.
Adjust Shadow
The Shadow option creates a drop shadow for each item. For a stronger 3D effect, it is better to use the Shadow together with the Light properties. In such a case, make sure that the shadow angle corresponds to the light angle. The light spot reflection and shadow should appear approximately on the opposite sides of the item.
The Shadow settings include the following:
- The Blur parameter defines the density of the drop shadow.
- The Distance parameter defines the offset between the object and shadow, which visually looks like the distance between the object and surface behind it.
- The Angle of the shadow changes the location of the virtual light source.
- The round control lets you adjust the Distance and Angle at the same time. Drag the handle off the center to see the shadow.
- The Color parameter offers a shadow option other than gray.
That’s it! Now you know everything about Spray Fill and can start experimenting with different settings to achieve stunning results.