Working with Layers
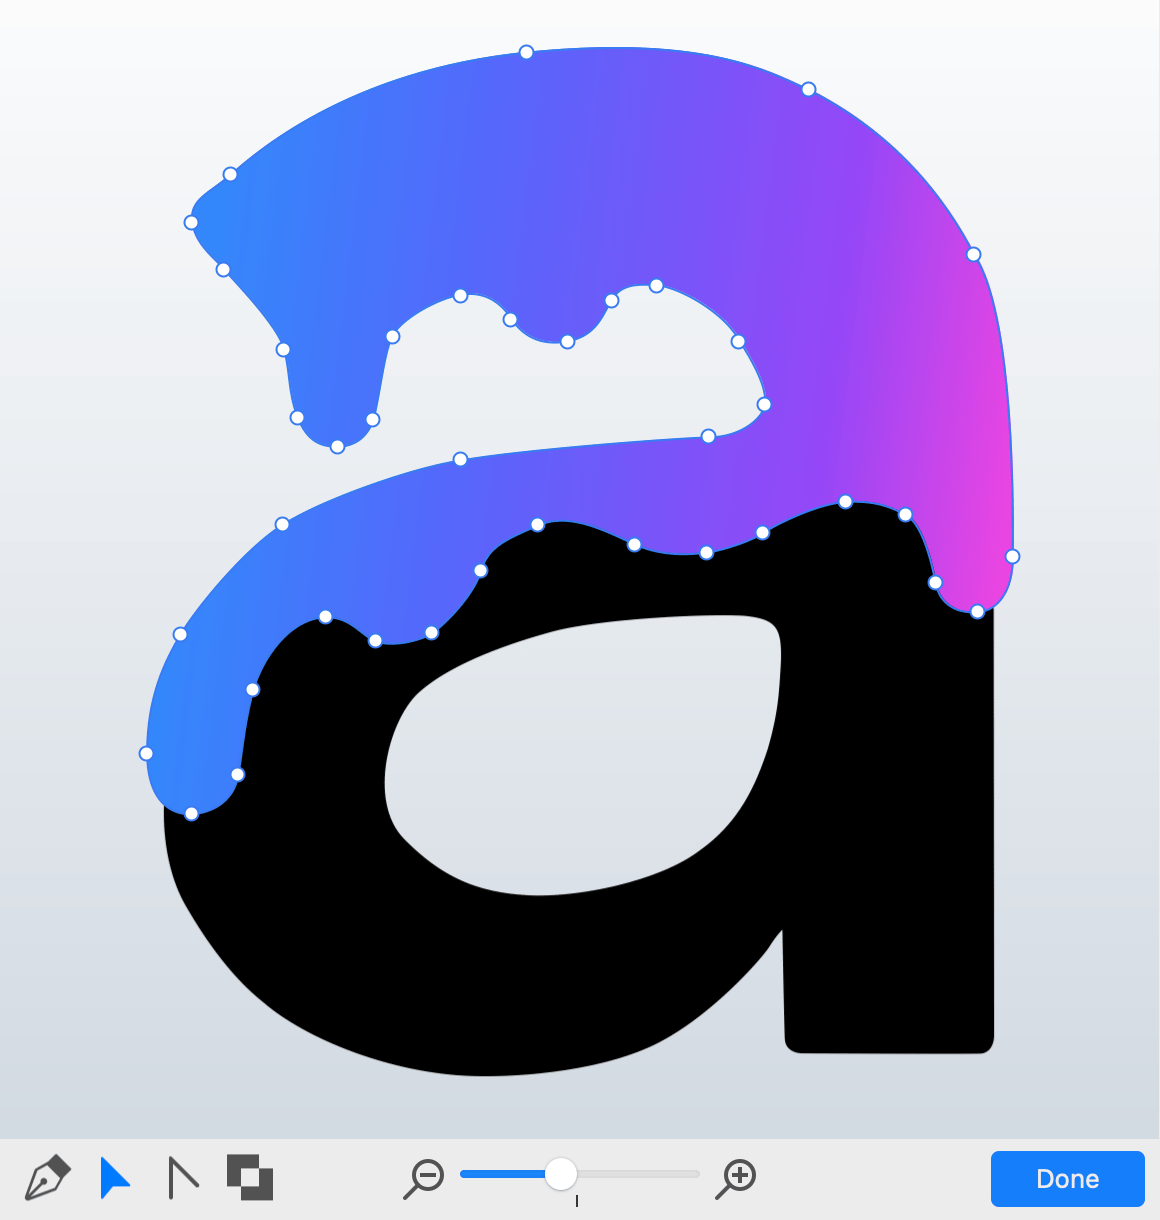
The Vector Shape Editor
The built-in vector editor lets you create and modify graphics in the vector format.
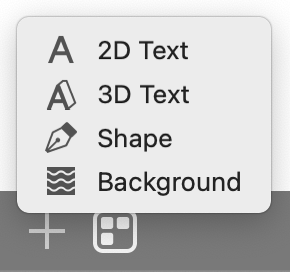
To start drawing a new path, click on the plus button below the canvas and choose Shape. You can also select Layers > Pen Tool Create in the main menu.
In order to edit an object on the canvas, double-click on the object.
While the vector editor is activated, its tools are displayed below the canvas.
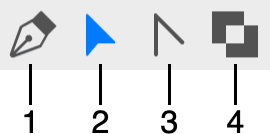
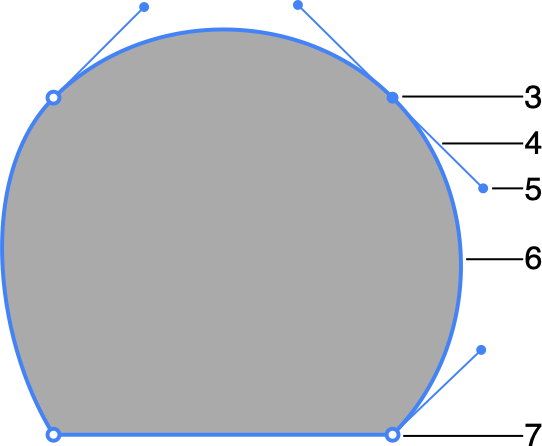
1 – The Pen tool is used to add or delete points when you draw or edit a path.
2 – The Move tool lets you move anchor points or adjust their direction lines.
3 – The Convert Anchor Point tool changes the point type from smooth to corner and vice versa.
4 - Reverse the direction of a selected path. To select the path in the editor, click inside the shape with the Move tool.
Note that editing the outline of objects of certain type (e.g., 2D objects with a transformation applied, or 3D objects) takes place in a different editor that opens up in a separate window.
Points and Paths
A vector shape comprises anchor points and lines that connect them. Anchor points mark the beginning and end of each line (or segment). By adding one line after another, you create a path. The path can be closed. This means that it begins and ends at the same point.
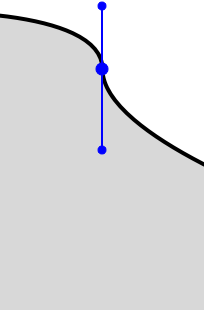
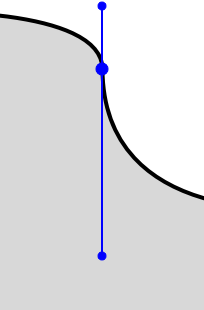
Anchor points can be of two types: corner point and smooth point. When you change the type of a point, adjoining lines may change from curved to straight and vice versa.
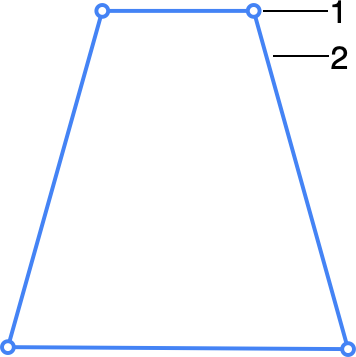
1 – Corner point. At a corner point, a path abruptly changes its direction. A corner point may join either straight or curved lines in any combination. A corner point with two straight lines doesn't have the direction lines.
2 – Straight segment.
3 – Smooth point. At a smooth point, a path continues following the same direction. A smooth point joins only two curved segments.
4 – Direction line.
5 – Direction point. It is a handle on the end of a direction line. Moving a direction point, you can change the length and angle of the corresponding direction line.
6 – Curved segment.
7 – Corner point.
The direction of a curved path in a smooth anchor point coincides with the direction of the direction line. Leaving the anchor point, the path branches off from the direction line. The longer the direction line is, the longer the path that passes near it.
Drawing a Shape
To draw a shape with straight segments:
- Click on the plus button below the canvas and select Shape to activate the vector editor.
- Activate the Pen tool (the editor activates it by default).
- Click on the canvas to set the first anchor point as the beginning of the path.
- Click several more times to add as many corners as you need.
- Make the final click to define the end of the path. In order to make the path closed, click on the first point. The tool displays a small circle when you move the cursor near the beginning of the path indicating that clicking at that point will make the path closed.
- Click on the Done button to close the editor.
To draw a shape with curved segments:
- Activate the vector editor.
- Select the Pen tool.
- Place the cursor where you want to add a new point. Press the left mouse button and move the cursor to adjust the shape of the path in proximity to the point. Release the mouse button.
- Add more points as described above.
- Click on the Done button to close the editor.
There is another way to create a path with curved segments. You can add points for your new shape keeping all of the segments straight. Then activate the Convert Anchor Point tool and click on points that should be converted to the smooth point type. Converted points will display their direction lines. Drag the corresponding direction points with the Move tool to set the curvature and direction of segments. It is common to use both methods of creating curved segments because it is easier to draw the path roughly and then adjust points with greater precision.
Images that you create in the editor are solid shapes, not outlines.
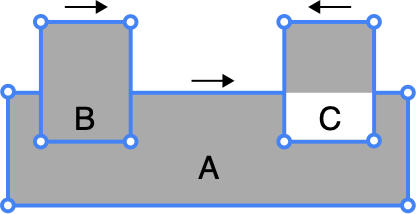
The direction that you draw a path matters when you draw one shape over another in a single object, or when the path crosses itself multiple times. In the picture below, shapes A and B were drawn in the clockwise direction. C was drawn in the counterclockwise direction. The area where the A and B shapes overlap remains solid, while the intersection of A and C is a hole.
The vector editor lets you change the direction of a path using the Reverse Path Direction tool.
Adding Anchor Points
You add anchor points when you draw a path.
To add more anchor points to an existing path, activate the Pen tool and click on a path segment.
Deleting Anchor Points
To delete an anchor point, click on it with the Pen tool. The icon of the Pen tool cursor has a minus sign when its function switches from adding points to removing them. If the deleted point was in the middle of the path, the two points before and after the deleted one will be connected with a new segment.
You can also select a point using the Move tool, and then press the Delete button. If the point was in the middle of the path, a gap will appear in place of the removed point and two segments.
Changing the Type of Anchor Points
To change the type of an anchor point, click on the point with the Convert Anchor Point tool.
Moving Anchor Points
To relocate an anchor point, drag it with the Move tool. A straight segment attached to this point will change its direction. A curved segment will change the direction and shape.
The Move tool is also used to move the direction points in order to adjust the shape of the path.
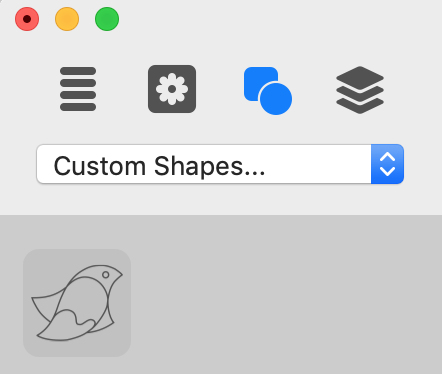
The Custom Shapes Library
Objects that you create using the vector editor are stored in your document. You can save a copy of such an object in the Custom Shapes library to be able to add it to another document. An alternative way to share an object between documents is to copy and paste it.
The built-in storage for user's shapes is located in the Shapes section of the Content panel. You need to choose the Custom Shapes category from the drop-down menu.
To add an object to the Custom Shapes library, select this object on the canvas and click the plus button at the bottom of the library.
To remove an object from the library, click on its icon in the library to select it. Then click the minus button.