Customize Designs
To open the editor, double-click on the design's thumbnail in the gallery, or click the Edit button in the Preview window.
The editor lets you type in your own text and adjust the color of the text and background. You will also have the ability to adjust some graphic effects. If you wish to create designs from scratch, or have more effects available, we recommend you take a look at the Art Text software.
The Editor Window
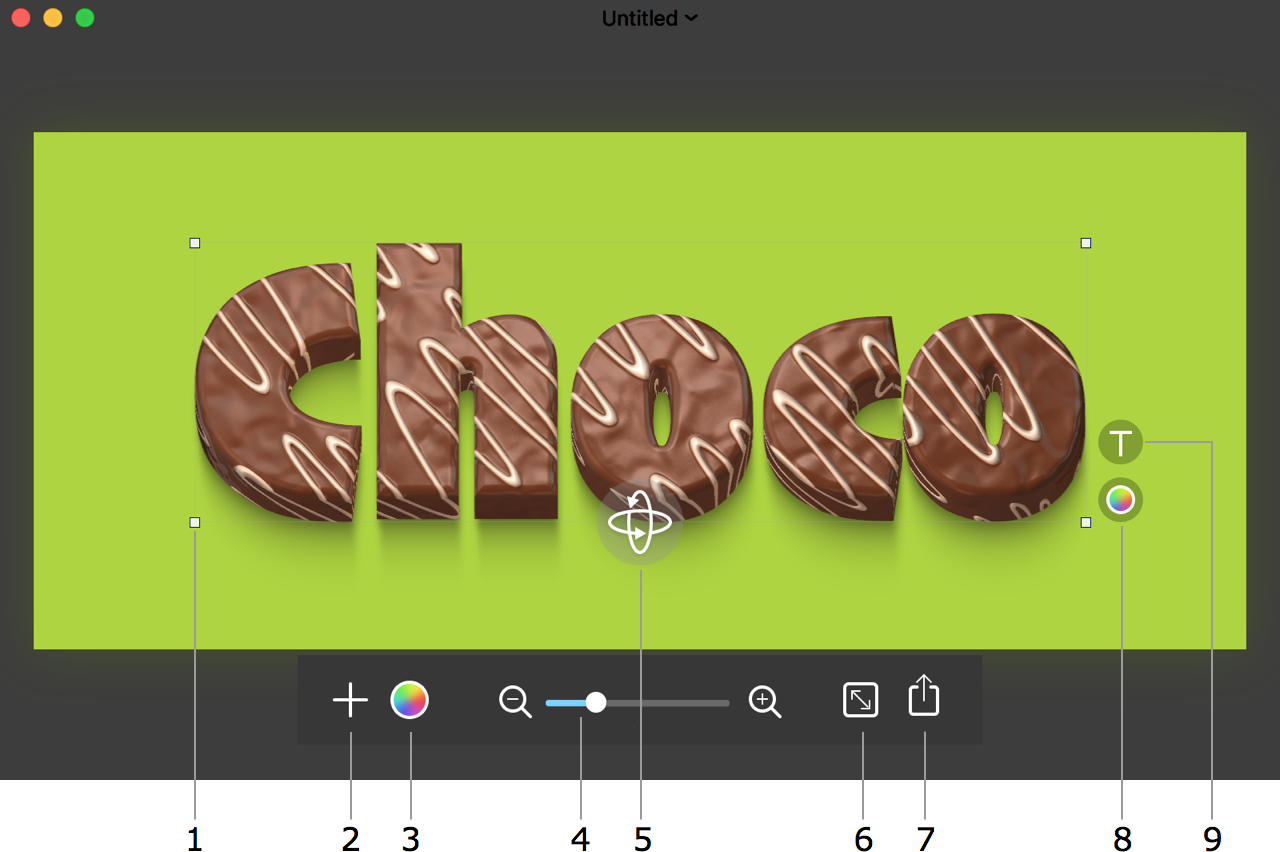
1 - Selected objects display handles at the corners. Most objects also have handles in the middle of the selection frame sides. Handles are used to resize and rotate objects, which is explained in more detail below.
2 - Add a new text or image. New text will have basic formatting.
3 - Adjust the Hue, Saturation or Contrast of the entire design.
4 - Zoom in or out.
5 - The 3D rotation handle. Only certain text objects have this tool.
6 - Set up the document size.
7 - Export. Here you can choose to export your work as an image, copy it to the clipboard or share it.
8 and 9 - Change the properties of a selected object. There can be one or several buttons depending on the object type. These buttons are explained in the Object Properties section.
Document Size
Click this button to open the Document Size panel.
It makes sense to verify the document size before you start modifying a template.
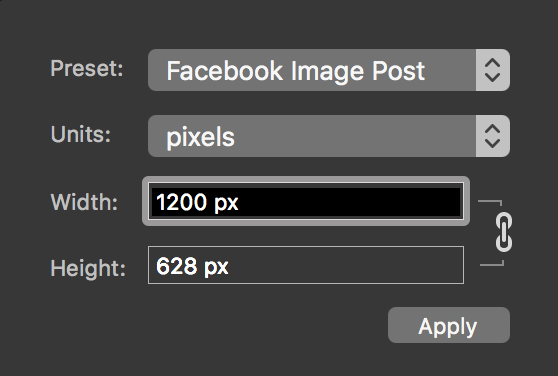
You can choose one of standard options in the Preset drop-down menu, or set up your own document dimensions.
Notice that changing the resolution in the Export dialog will not affect the final size of an image when you export it to a raster format (e.g., JPEG). If you want to have an image with more pixels per side, increase the image size here.
Manipulating Objects
All objects that can be present in a document are either text, 3D text, or images (including solid color backgrounds). The object type determines what kind of properties you can modify. Moreover, similar objects may have different sets of settings, depending on the particular design.
Select an Object
In order to modify, resize, or rotate any object, you must select it.
To select an object, click on it.
Selected text and images display side and corner handles on the selection frame. A 3D text has corner handles and rotation control.
Notice that an object with a transparent background may overlay an object you want to select. So, after clicking on an object, just make sure that the correct one was selected.
Move an Object
To move an object, drag it with the mouse. Backgrounds in templates cannot be moved in this way in order to avoid moving them accidentally.
You can also move an object by pressing the arrow keys. Or, to move an object quickly, hit arrows while holding down the Shift key.
Resize an Object
To resize an object, drag its corner or side handle. Moving a side handle changes the object's size without preserving its aspect ratio.
When you place the cursor over a handle, the cursor turns into a bi-directional arrow ![]() , indicating that resizing is now possible.
, indicating that resizing is now possible.
Rotate an Object
To rotate an object, place the cursor outside the object near its corner handle. Move the cursor around until it turns into a curved bi-directional arrow ![]() . Click and drag the handle to set a new angle of the object.
. Click and drag the handle to set a new angle of the object.
3D text has an additional 3D rotation tool. Drag it with the mouse to turn the 3D text in different direction.

Object Properties
The program displays one or several buttons near a selected object. These buttons open the properties panels.
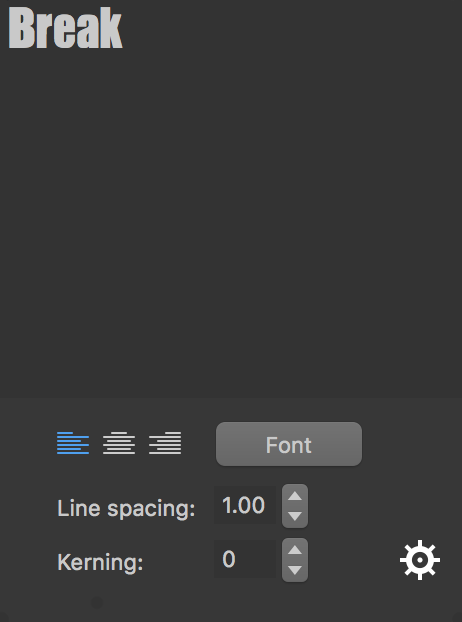
Edit Text
Click this button to open the text editing panel. It lets you type or paste text, change font, set alignment and adjust spacing between lines and characters.
A button with the gear icon is explained in the Adjust Effects section.
Change Color
Click this button to set up object's color.
At the top of the panel, you can choose whether to fill an object with plain color or to adjust colors created by a texture or other effects.
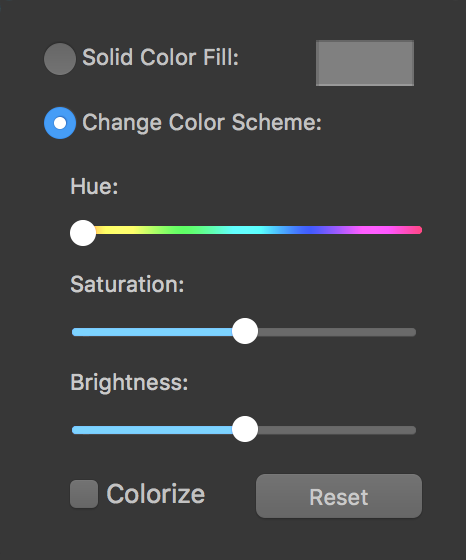
The Colorize option removes the original colors from the image preserving only the brightness. Then, the image is tinted according to the Hue slider. So, the resulting image is a monochrome version of the original one.
Adjust Effects
To adjust graphical effects applied to an image, click on the gear icon near the image. Texts have this icon on the text editing panel.
The set of controls on the panel very much depends on the object's type and, particularly, on a design that is opened in the editor. Here are a couple of examples.
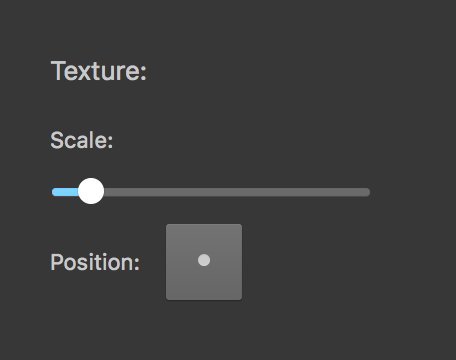
The following settings relate to a 2D text with a texture applied. The panel lets you scale the texture, and adjust its position.
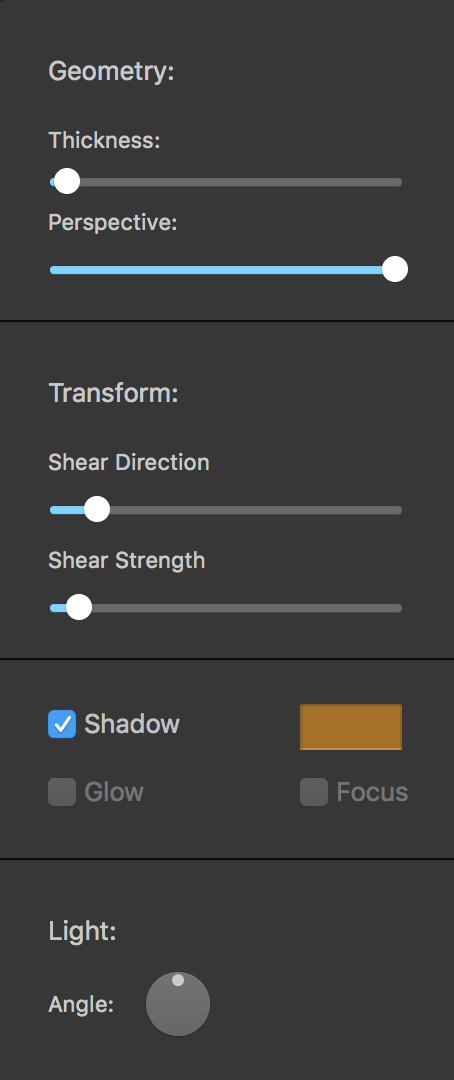
The next image displays a possible set of tools that will adjust the look of a 3D text. Such objects usually let you change the geometric properties of individual letters (e.g. thickness), transform or distort the whole text, or change the location of the light source.
Choose a New Background Image
The folder icon shows up when you select a background image. By clicking on this icon, you can choose another image from Photos or from a folder on your disk.
If you want to keep the background and add one more image, just drag it from Finder into your design.
Managing Layers
Objects in a document create layered structure with one object per layer. If you place two objects at the same location, one of them will appear over another. The program places a new object at the top of others. So, if you added a background image, you will need to put it behind text.
To change the order of objects in the stack, use commands from the Layers menu.
| Select Next Layer | Select the next layer in front of the current one. |
| Select Previous Layer | Select the next layer behind the current one. |
| Bring Forward Bring to Front Send Backward Send to Back |
Move the selected object in front of or behind other objects. |
Some of these commands are also present in the object's context menu.