2D Tools and Effects
Applying Masks
The Mask effect creates transparent areas on an object. Masks can be used to make a part of an object invisible, or create effects like cracks or stains, or to combine several objects.

To apply a mask, use the Mask section in the Inspector.
Masks in the library are black and white images. Black areas in a mask create transparent areas on an object.
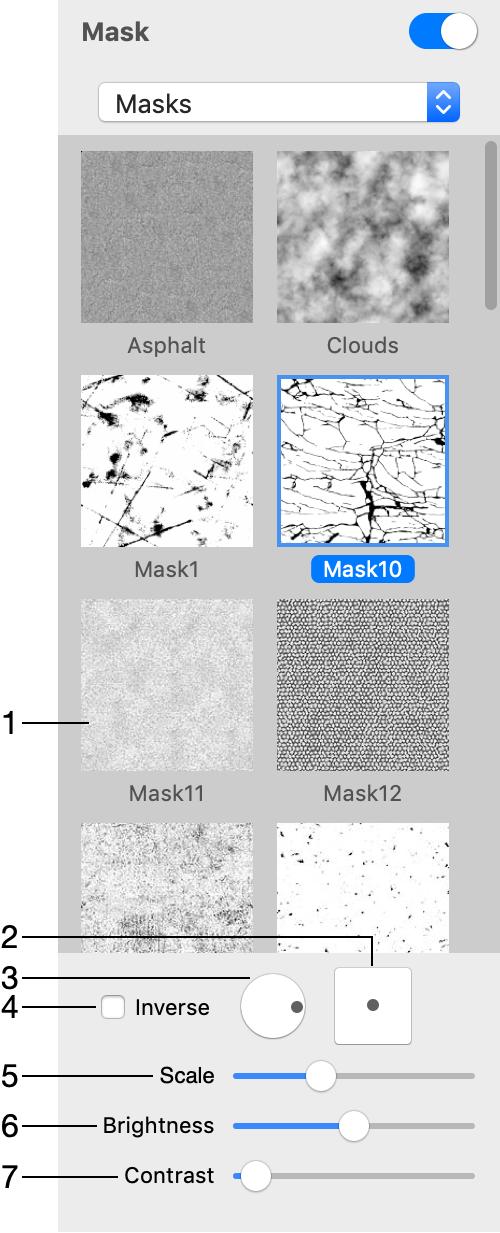
1 – The library of masks. Click on it to bring up the list of masks.
2 – The offset of the mask in relation to the object.
3 – The rotation angle.
4 – Inverse of the mask.
5 – The scale of the mask. The mask will be tiled if you make it smaller than the object.
6 – The brightness of the mask. This parameter makes the whole object more or less opaque.
7 – The contrast of the mask.
The Brightness and Contrast parameters are helpful when you use a colored image as a mask. In this case, these two parameters let you set up the threshold between the transparent and opaque areas.
The program applies a mask to your object after applying other effects such as transformation. This means that if you distort an object, the mask will not be affected.