2D Tools and Effects
Distortion Effects
Distortion effects belong to a special class of effects that modify the contour of the object before other effects are applied. The contour here is defined as the visible edge of the object. In other words, it is where pixels of the object's body end and transparency begins. Some of the distortion effects also create new holes in the object.
These effects are intended to work with the object's shape. It might be useful to set up the distortion effects while an object has only plain color fill and no other effects applied. All of the distortion effects have something in common with masks. They manipulate the transparency of an object's pixels without affecting the colors.
You can combine multiple distortion effects to achieve unique results. A set of effects can even include the same type of effect with different settings.
The Distortion effects are located in the Effects tab of the Inspector.
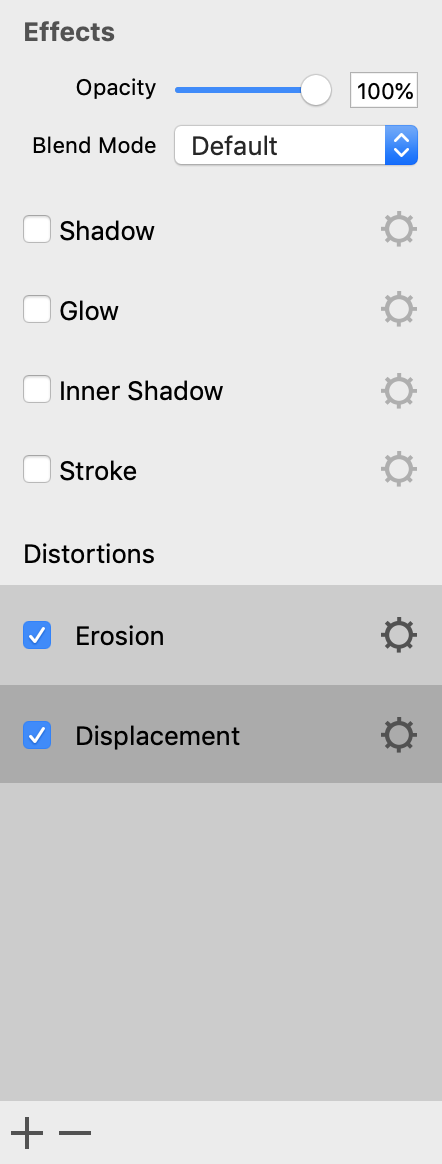
By default, the list of the distortion effects is empty. You apply effects to an object by adding them to the list.
To apply a Distortion effect, click the plus button right below the list and choose one of the effects. You can add the same effect multiple times.
You can use your own effects in the program. The plus button lets you choose the Custom option in order to select a distortion effect saved as a *.qtz (Quartz Composition) file. Quartz Compositions can be created in the Quartz Composer.app. For more details, please contact Technical Support.
In order to deactivate an effect, click on its name in the list. Then click the minus button.
To deactivate an effect without removing it, use the check box near its name. This makes sense if you want to keep an already made setting in order to re-apply the effect to the same object later.
To set up the effect, click on the corresponding gear icon.
The Order of Effects
The order of effects in the list can significantly impact the result. The effect at the top of the list is applied first.
To change the order of effects, drag an effect to a new position in the list.
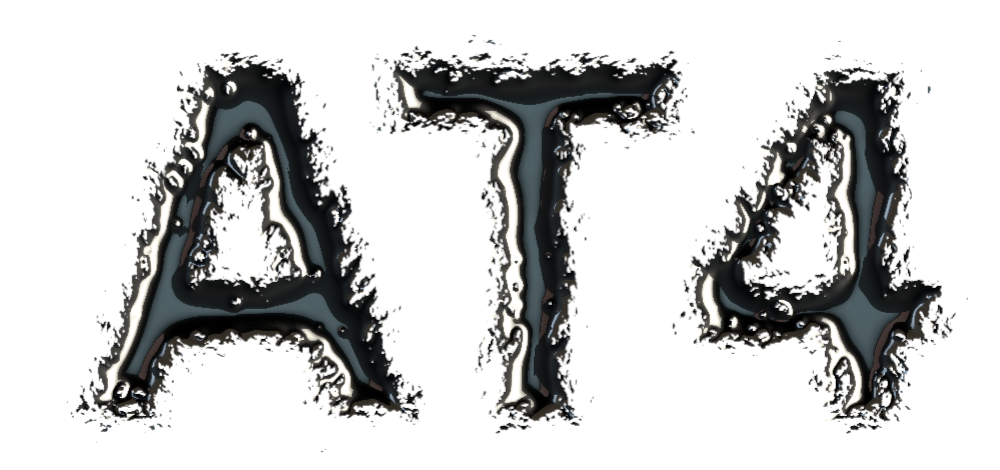
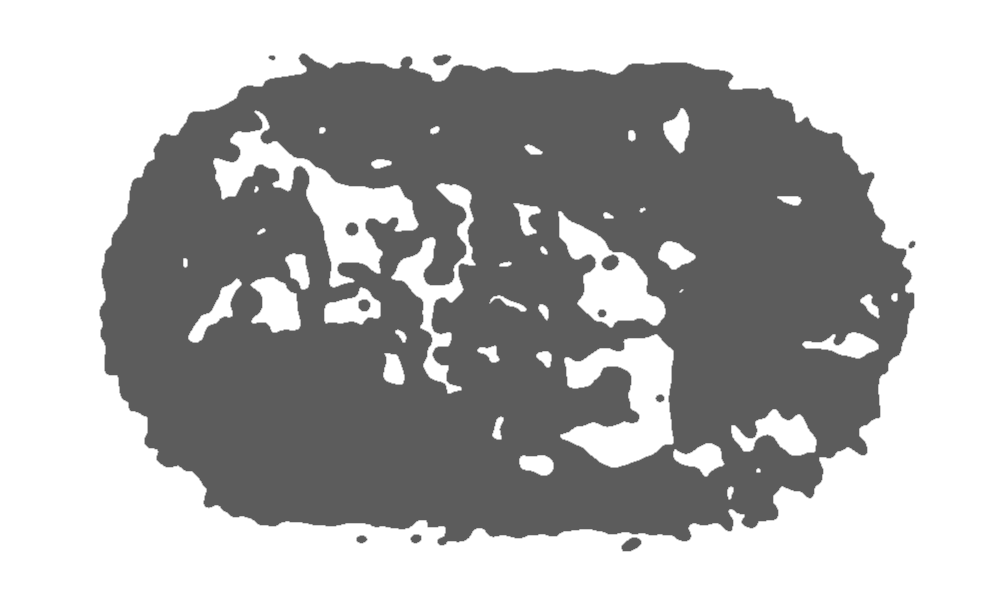
In order to illustrate why the order is important, we can apply two effects to a shape.
First, let's see how each of the effects works independently.
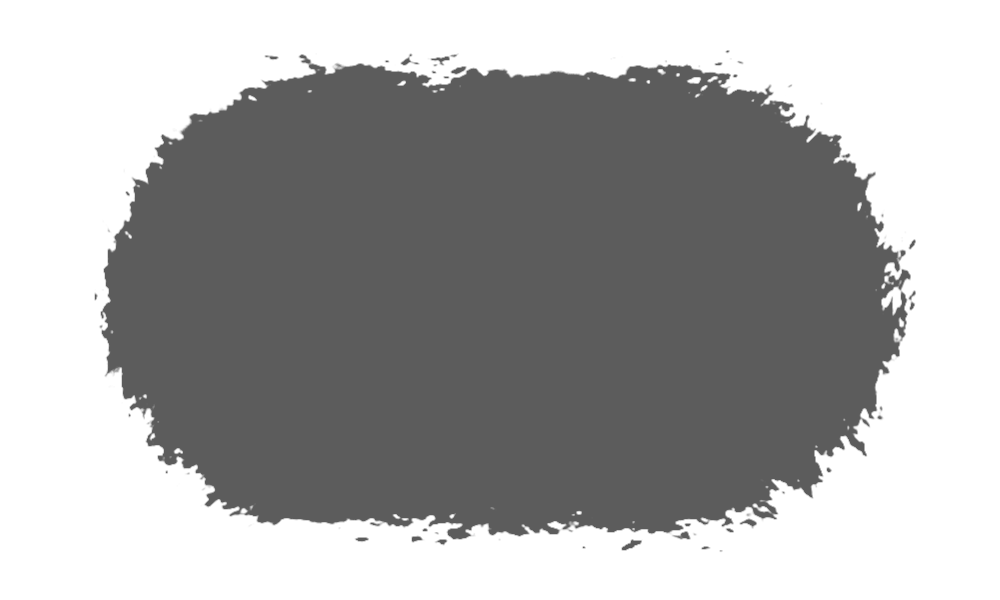
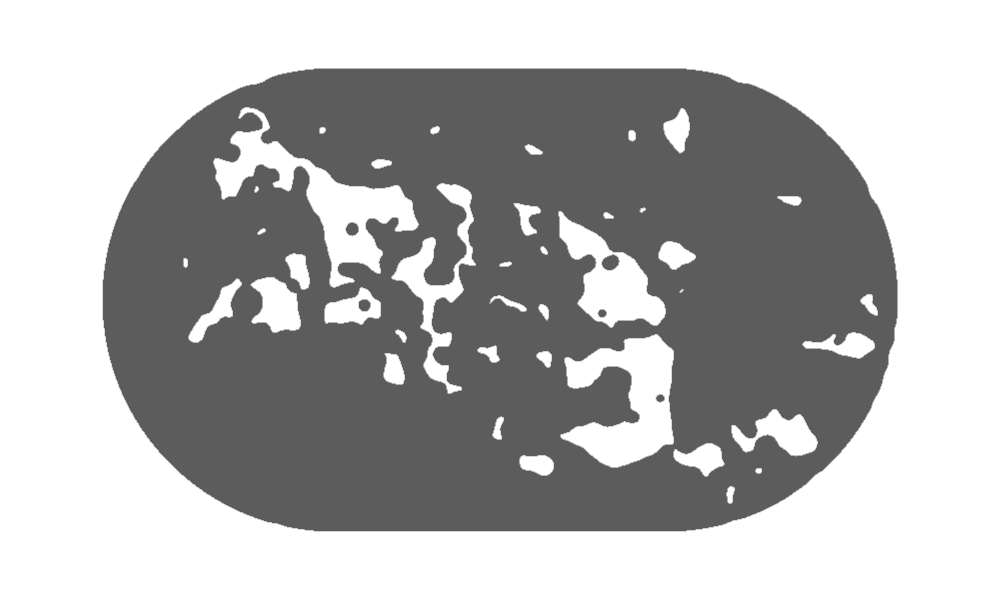
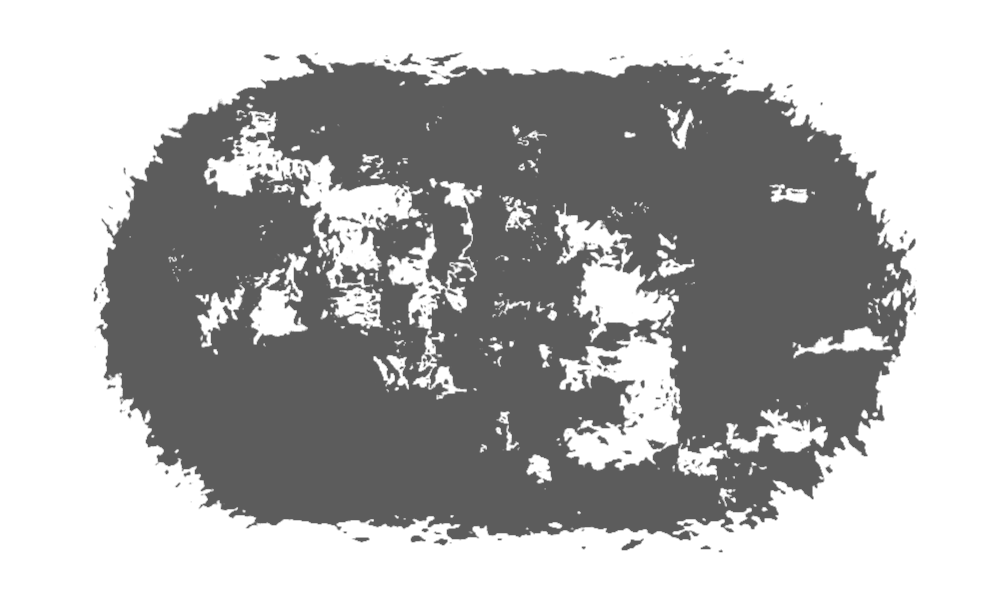
In the next image, Displacement was applied first. It made the edge of the shape jagged. Then Erosion created holes in the object and additionally affected the external edge.
Here, we changed the order of the effects. Erosion was applied first, creating holes in the object. The external edge was changed insignificantly. Displacement, applied after that, made edges jagged again. This time, it jagged not only external edges but also edges of holes.