2D Tools and Effects
The Spray Effect
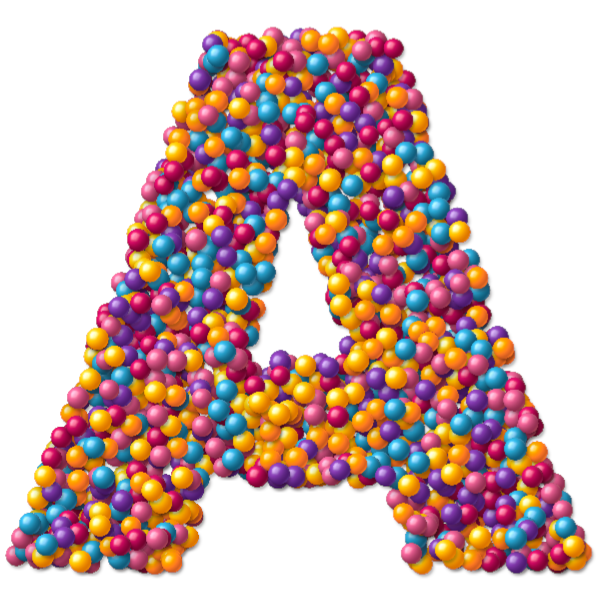
The Spray tool can fill the given area with numerous copies (or variations) of small images. We will call such an individual image "item". The covered area is basically defined by the object's outline.
Unlike filling an object with a texture, Spray won't create any visible pattern. The created effect will look random. You can customize the set of items used in the effect, how they look, and how many of them should appear in the artwork.
To apply and customize the Spray effect, open the Fill section of the Inspector, and choose Spray.
Changing the settings in the Inspector will not affect presets in the library.
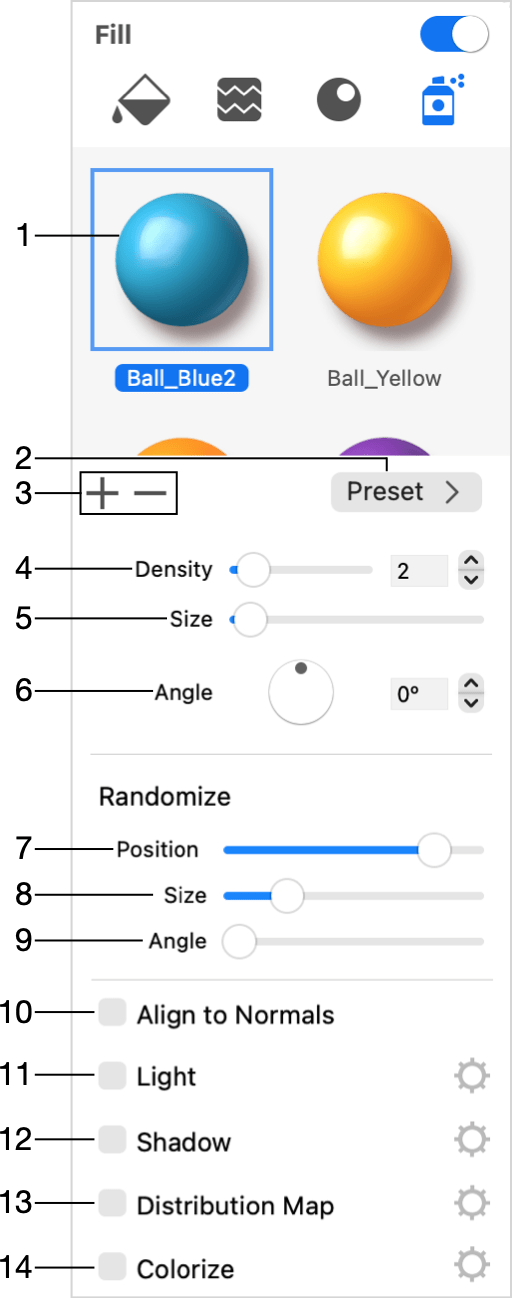
1 - The set of items used in the currently selected preset.
2 - Open the popup menu with presets.
3 - Add or delete an item from the current set.
4 - The density of items on the object. You can opt to have gaps between items, or to make them overlap leaving no gaps.
5 - The size of items. If items have different sizes (see Size in the Randomize section), this control defines the maximum size.
6 - Rotate all of the items by the same angle. This angle will serve as the median if the Angle slider in the Randomize section is not in the leftmost position.
7 - Define the randomness of the items' location. The far left state of this control places items in rows and columns. The farther to the right you move the slider, the more random location items will have.
8 - Apply random sizes to different items. Items will have the same size at the far left position of the slider. If you move the slider to the right, some items will decrease in size.
9 - Rotate items by random angles. Items will have the same orientation at the far left position of the slider. If you move the slider to the right, items will get random positive or negative deviations from the original angle. The position of the slider will define the maximum deviation angle.
10 - Align items to object normals. See Align to Normals for more details.
11 - Activate the light effect. See Light for more details.
12 - Activate the shadow effect. See Shadow for more details.
13 - Apply the distribution map. See Distribution Map for more details.
14 - Apply the Colorize effect.
Presets
A preset stores information about items used in the Spray effect and settings of the effect.
To choose a preset, click the Preset button, and then click on a thumbnail in the list.
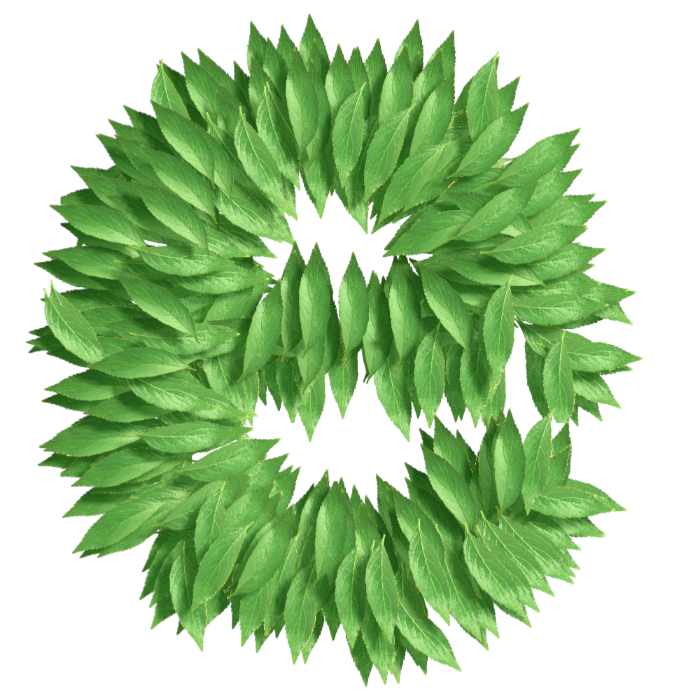
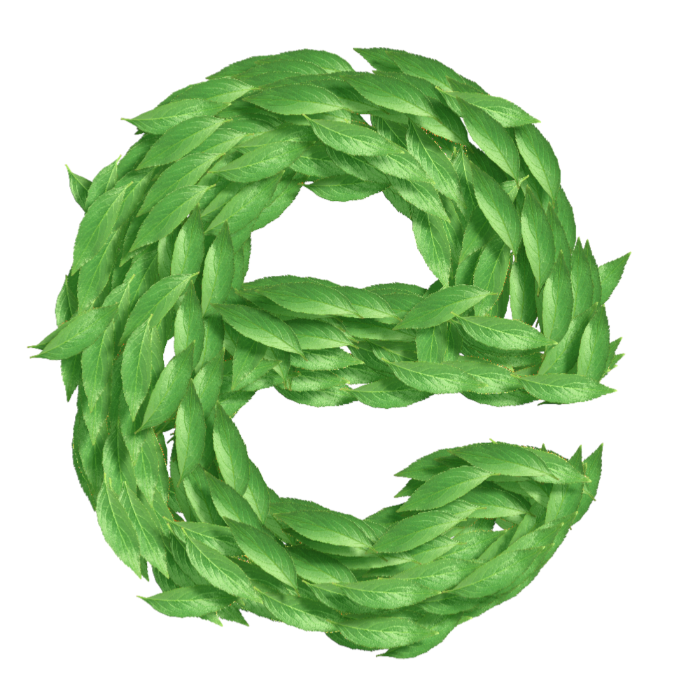
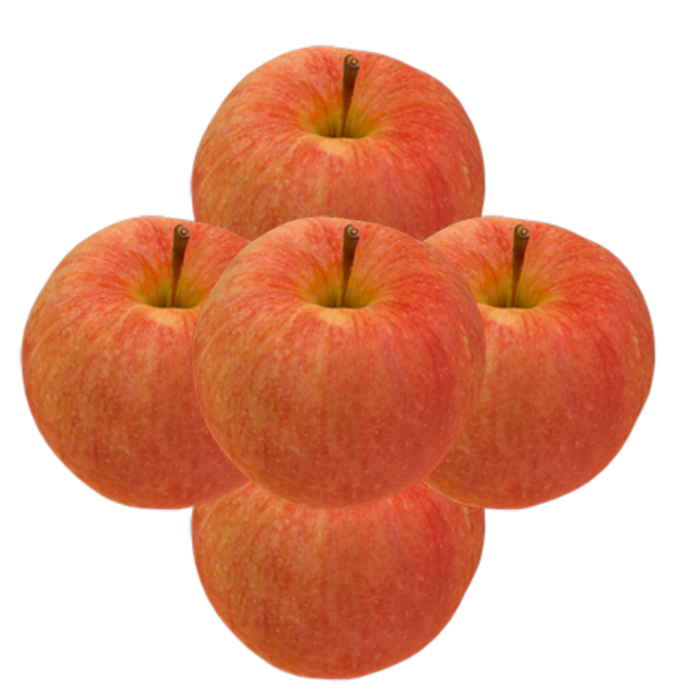
The program has a number of default presets and a library of items. Items, such as coffee beans, leaves and so on, are grouped into categories. The default presets are created using items from the library. Some of the presets use all of the items from the corresponding category, others use only a part of the available items.
The library indicates items that are already present in the preset by blue frames.
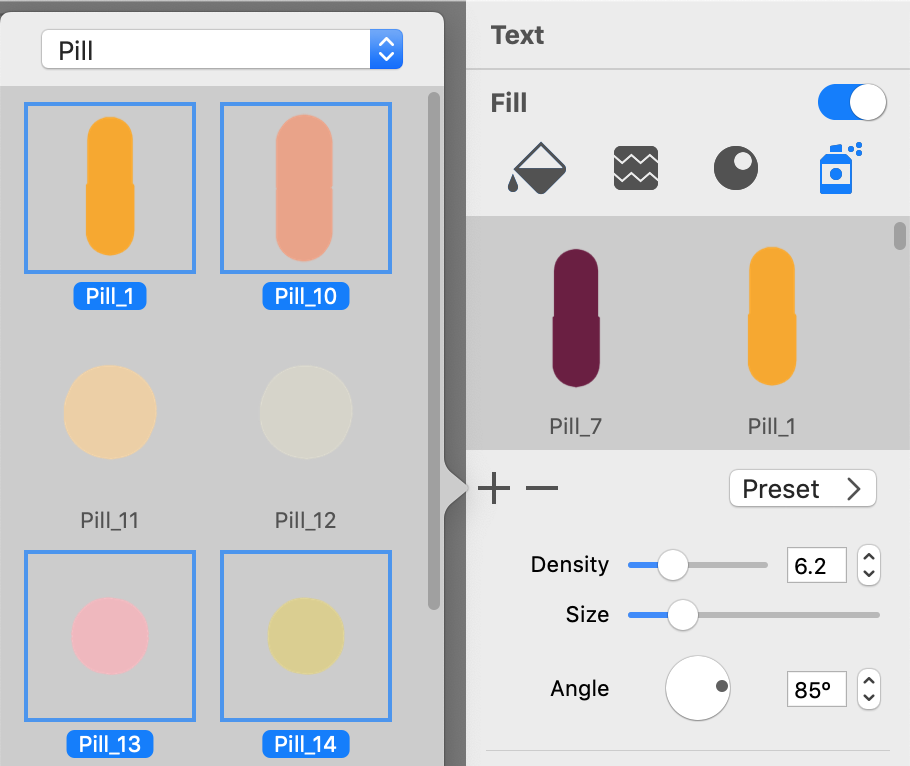
Once a preset is loaded, you can change its settings, and also edit the set of items in it.
Notice that any of your modifications will not affect the default presets. So, you can freely experiment with them. It will be easy to get back to your starting point by choosing the same preset again.
Adding and Deleting Items from the Set
To delete a particular item from the set, click on that item to select it. Then click the minus button.
To add an item to the set from the library, click the plus button. Then open a category and click on each item you want to add.
Notice that you can select Custom Folder… in the list of categories, and import your own images.
Creating Your Own Preset
Once you have changed the set of items as described above, you may want to save it for later use.

To save the current preset, click the Preset button in the Inspector. At the top of the preset library, choose Custom Folder from the pop-up menu. Finally, click the plus button at the bottom.
In order to delete a custom preset, select it in the list and click the minus button.
Align to Normals
The Align to Normals check box lets you choose an alternative way to set angles of items in your artwork. To see the maximum effect of this option, you should turn off the randomization of the angle (move the Angle slider in the Randomize section all the way to the left). Also, the items should be thin and long.
When Align to Normals is activated, the items become oriented off the middle towards outside the object. They may resemble cactus spines or fur.
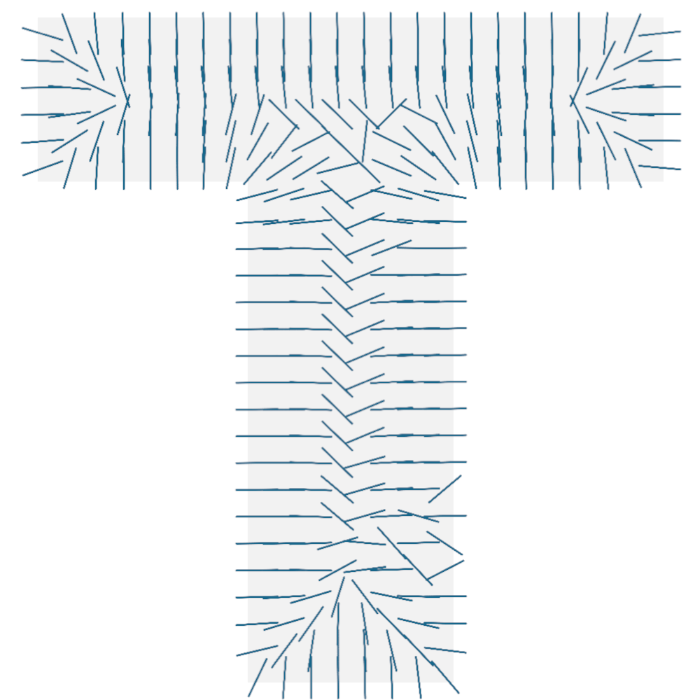
Note that actual graphics in the images can have a certain rotation angle by default. For instance, most of the leaves in the library are rotated by about 45 degrees. This means that you may need to adjust the Angle after enabling Align to Normals.
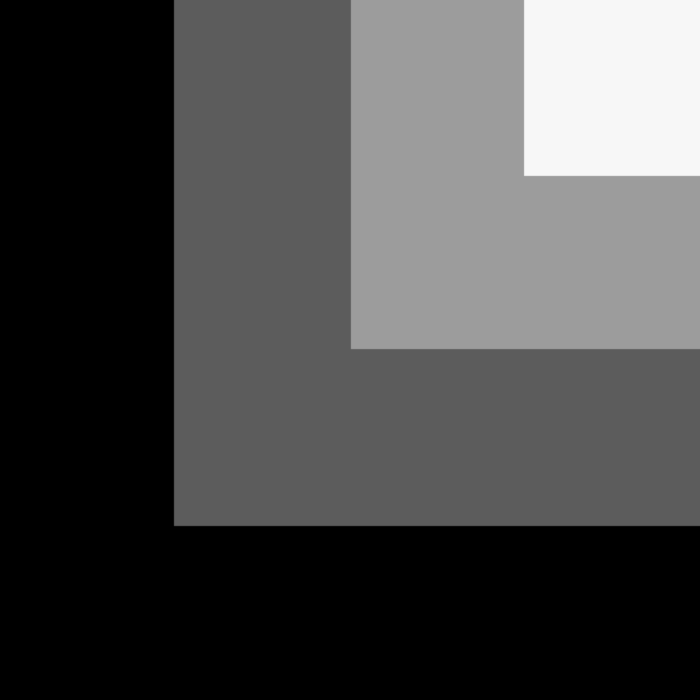
You can also adjust the angle in order to make items follow the direction of the object's outline. The images below show how different the results might be.
Light
The Light option can improve the 3D look of items. It adds a reflex with the possibility to adjust its position and other properties. Compare the images below.

Notice that some images in the library have a reflex and shadow. Consequently, there is no need to activate the Light and Shadow options for them.

Settings of the Light Option
To show the settings, click on the corresponding gear icon.
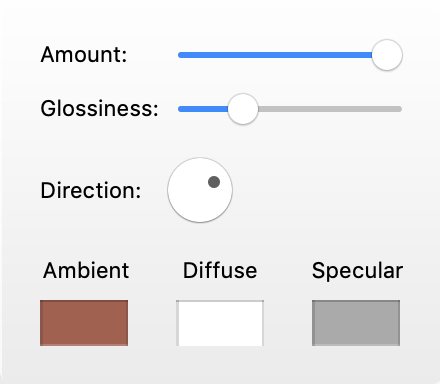
The Amount parameter lets you adjust how strong the effect is.
The Glossiness slider changes the size of the reflex. Glossier objects have smaller but brighter reflexes.
The Direction control moves the reflex around changing the position of an imaginary light source.
The Ambient color defines the object's color in the deep shadow. It can be dark gray.
The Diffuse color defines the object's color under diffuse light. In many cases, it coincides with the natural color of the object.
The Specular color is used to create a reflex. To adjust its size, use the Glossiness slider.
Shadow
The Shadow option creates a drop shadow for each item.
For a stronger 3D effect, it is better to use the Shadow together with the Light option. In such a case, make sure that the angles of Shadow and Light are set properly. The reflex and shadow should appear approximately on opposite sides of the item.
Settings of the Shadow Option
To show the settings, click on the corresponding gear icon.
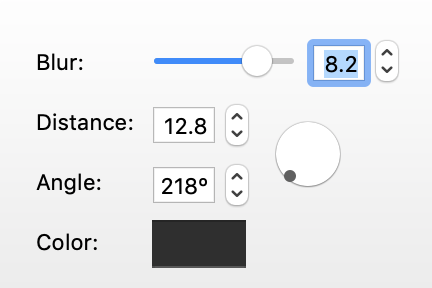
The Blur parameter defines the density of the drop shadow.
The Distance parameter defines the offset between the object and shadow which visually looks like the distance between the object and surface behind it.
The angle of the shadow changes the location of the virtual light source.
The round control lets you adjust the Distance and Angle at once. Drag the handle off the center.
The Color parameter gives you an option to make the shadow other than gray.
Distribution Map
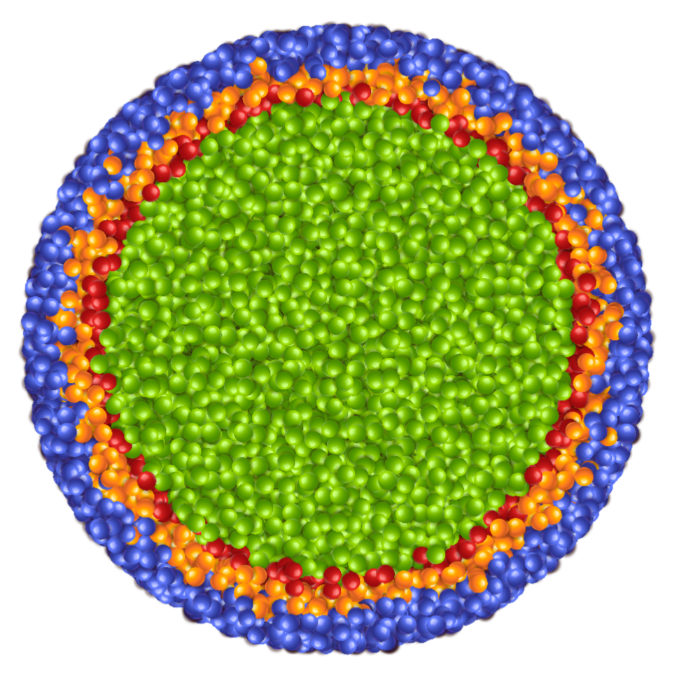
The Distribution Map option reduces the randomness of how items of different types are located.
In the image below, we can see distinctive areas taken by balls of each color.
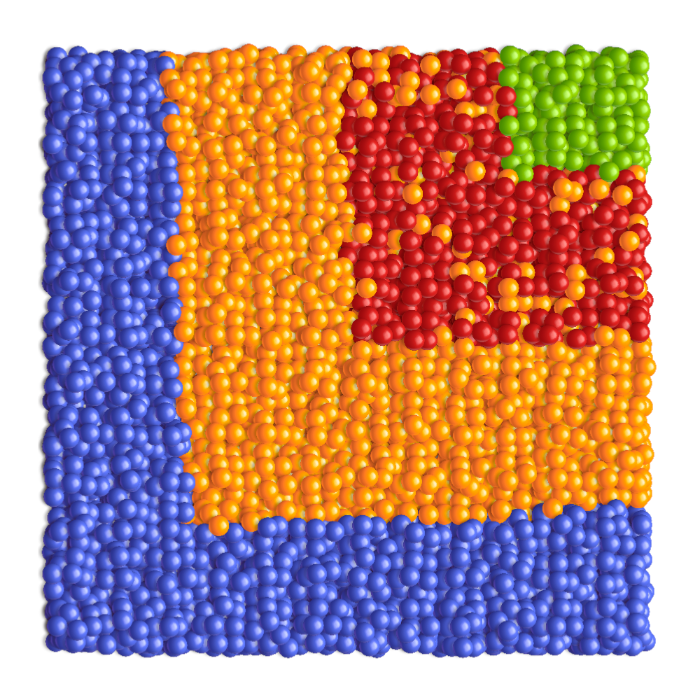
Items of the same type are located according to two factors. These are the order of items in the Inspector, and the settings that define the mapping principle.
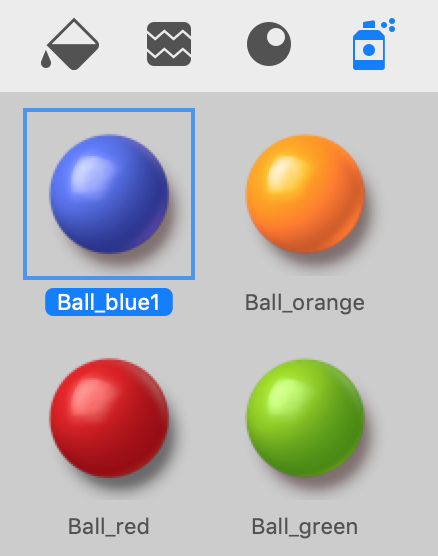
In our example, the order of balls in the Inspector is the following: blue, yellow, red, and green.
The image that defines the areas to be taken by the balls of each color consists of grayscale zones.
The Distribution Map option associates, or maps, each color to its own zone. The first ball in the list (blue) goes to the darkest zone. The following yellow color takes the second darkest area, and so on.
The order of items in the Inspector is simply the order they were added to the list. So, to reorder items, you need to remove them, and then add them in the desired order.
Settings of the Distribution Map
To show the settings, click on the corresponding gear icon in the Inspector.
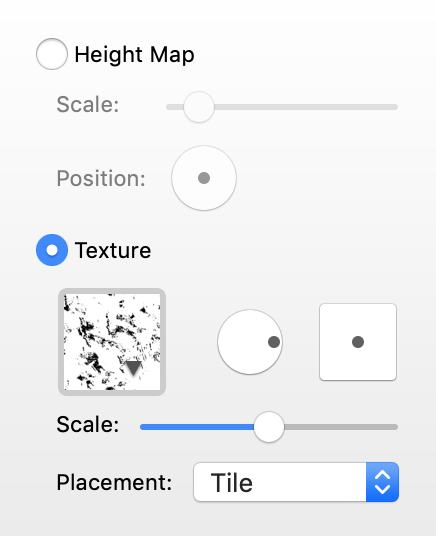
There are two major mapping options: Height Map and Texture.
The effect from using the Height Map resembles a circular gradient. The first item becomes distributed along the object's edge in the shape of a ring. The second item creates a smaller ring, and so on. The middle of the object is taken by the last item in the list.
The Scale parameter is used to change the amount of space taken by the items.
The Position control lets you move the structure off the object's center.
You can also map items to an image by selecting the Texture option. How this type of mapping works was discussed in the beginning of the Distribution Map section. We mapped items to a custom image, but you can also use textures from the built-in library.
In order to choose a new texture, click on the thumbnail of the current texture. The library will open up. The drop-down menu lets you select a category of textures. You can also click on Custom Folder… to select a graphic file for your texture.
The circular control to the right from the thumbnail is used to rotate the texture.
The square control defines the offset of the texture in relation to the object's center.
Using the Placement drop-down menu, you can select how the texture should fit the object. Imagine that the object in your document is of a rectangular shape, but the texture is a square. Since one doesn't fit the other exactly, you can select Stretch and allow the texture to be deformed. Or, you can choose Tile to preserve the aspect ratio of the texture, but allow tiling.
The Scale slider works only when Tile is selected. This slider changes the size of the texture so that you can fit one or multiple copies of the texture to the object.
Colorize
The Colorize tool lets you create an effect that resembles a mosaic. The tool tints items (e.g, Lego blocks) in colors that are present in a selected image. This tool differs from the Distribution Map. While the Distribution Map rearranges the colors of the given items, Colorize applies new colors. This is why even one item will be enough to create a colorful moraic.
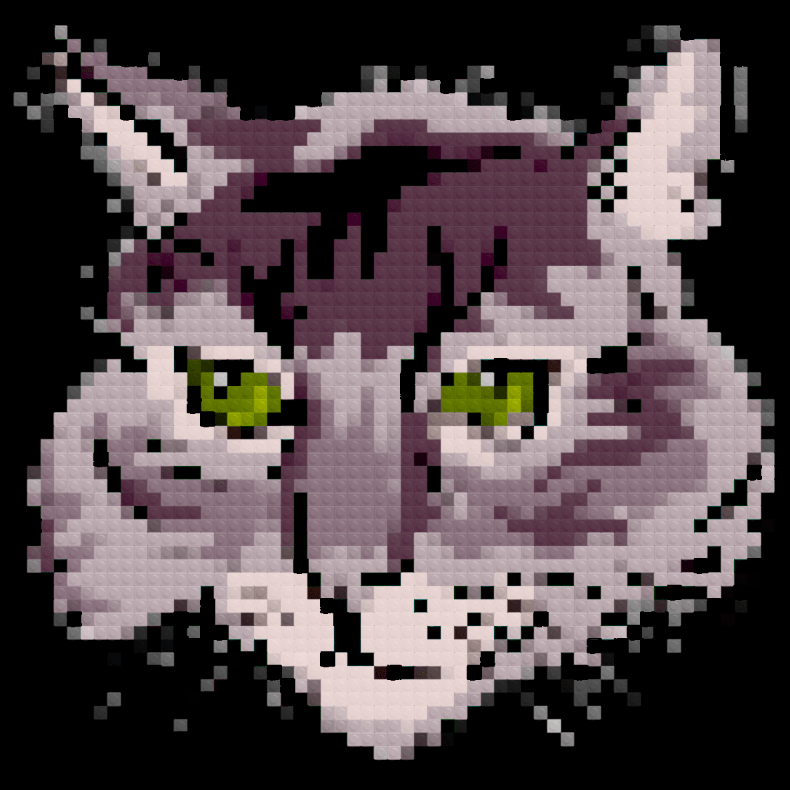
In order to create a mosaic, prepare an image that you want to recreate. Find out the aspect ratio of its sides. Add a rectangle or other shape to your document. You can find one in the library of Smart Shapes. Choose an item. Set the aspect ratio of the shape the same as the image has. It is recommended that you start with Lego blocks as they give the most predictable result. Set the Density and Size to smaller values. Set all of the Randomize options to minimum. Then activate the Colorize effect. Open its settings and click on the image box. Select the image that you have prepared. Adjust other effect settings if needed. You may also need to adjust the Density and Size properties.
The Colorize tool works best with images that don't have too many thin lines or small details.
The color and especially brightness of items affect the final image. It will be easier to start your design with a single item. Then you can experiment with adding more items of different colors.
Settings of the Colorize Effect
To bring up the settings, click on the gear icon.
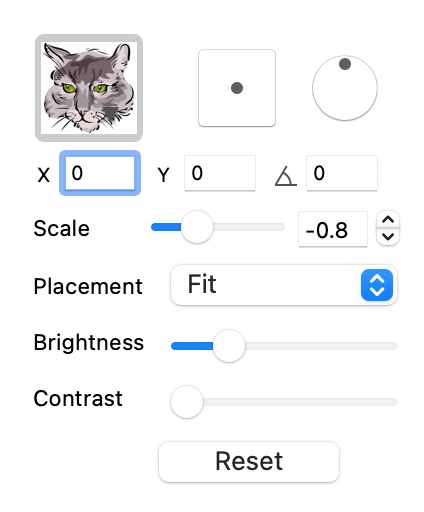
The image box lets you choose an image from the internal library or load a custom one. The image will fill a currently selected object according to the Placement option. Fit places the image so that its aspect ratio is preserved. The image will be cropped if its aspect ratio differs from the shape's aspect ratio. With Stretch, the image will fit the shape entirely but it can be distorted. The Tile mode lets you tile the image.
The square control lets you offset the image in relation to the shape. It is enabled only for the Tile mode. For greater precision, use the X and Y fields.
The Scale changes the size of copies of the image when it is tiled.
The round control lets you rotate the image in relation to the shape. It is enabled only for the Tile mode. You can also enter the angle into the field below.
The Brightness and Contrast sliders affect the selected image before it is further used for the effect. They may be helpful in emphasizing details.