Creating Images with Generative AI
AI Wizard Interface
To open the AI Wizard, click on the ![]() button in the main window. The AI Wizard lets you set up the task for the AI and start rendering.
button in the main window. The AI Wizard lets you set up the task for the AI and start rendering.
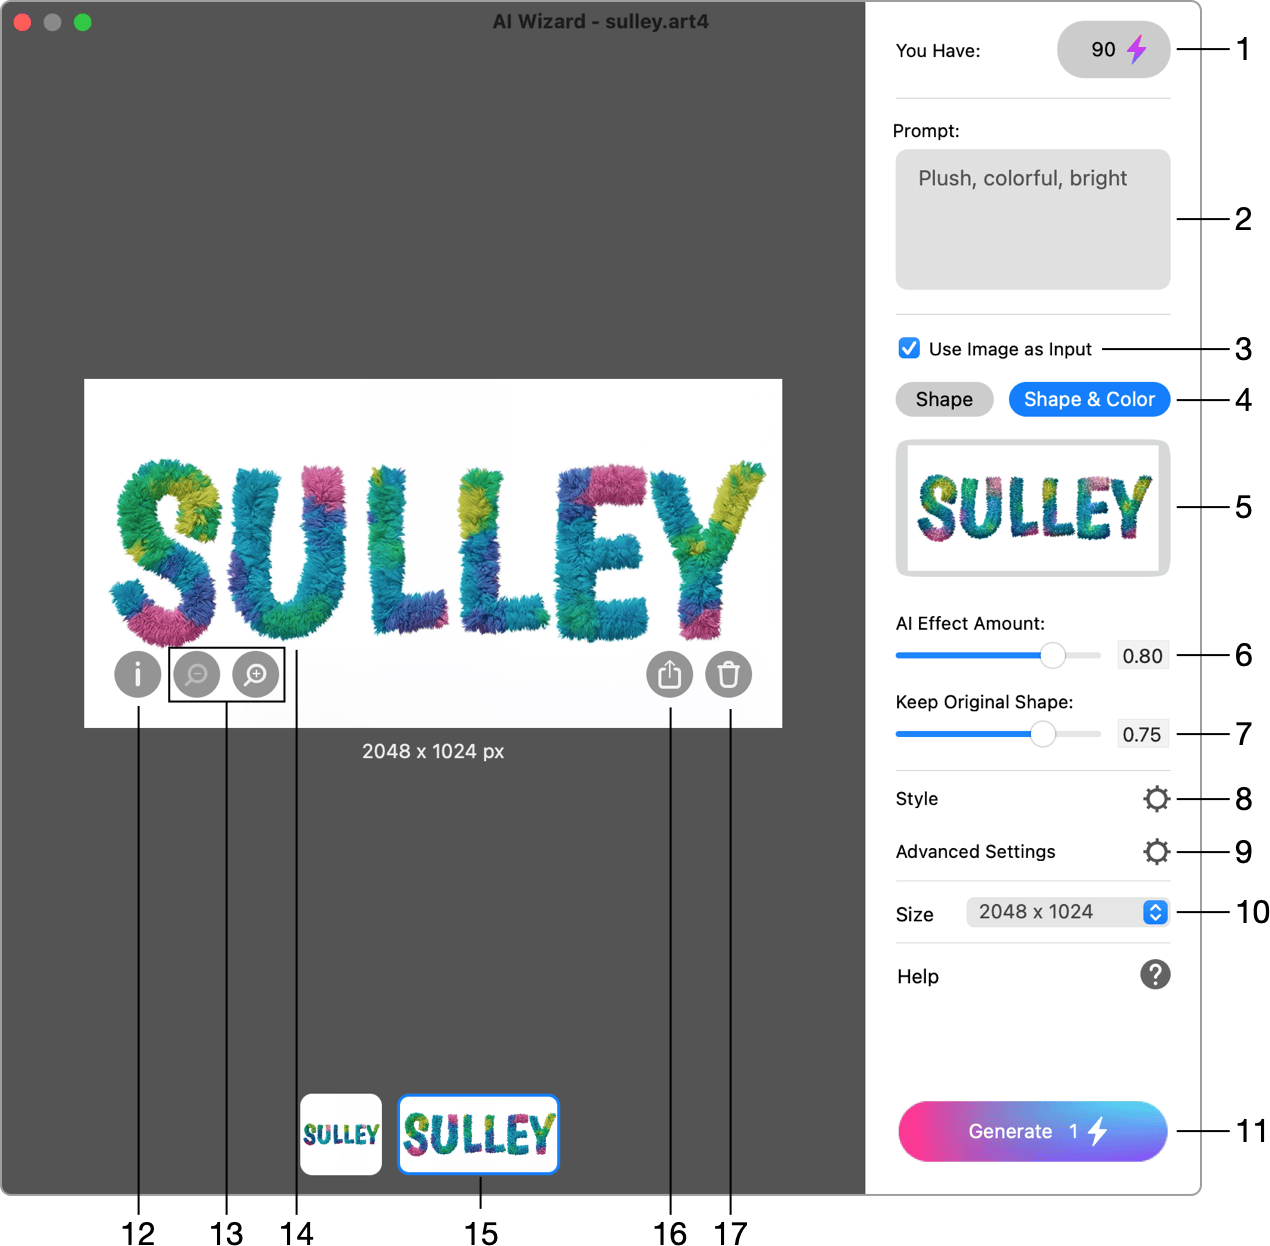
1 - Displays the number of remaining render coins and upon clicking offers the option to purchase more.
2 - Prompt is a textual description of the image that you want to create. Parts of the prompt should be separated with commas. Only the English language is supported. Example: stones on white background, glossy, top down view.
3 - A preview of the input image.
4 - The Keep Original Shape slider defines how closely the AI must preserve shapes to match the original design. Set a lower value if shapes in the input image are not so important.
5 - The Use Source Design Style value determines how much of generative AI will be used in the resulting image. With a higher value, the output image will be more similar to the input image.
6 - The Style is a specially trained AI model designed for a specific effect. Such styles are used in AI templates from the Design Gallery to create specific text effects, including balloon alphabet, fur, oil paint, bread, water and many more.
When you use the AI Wizard for the first time, there may be no styles in the list. However, once you open an AI template (free or paid) that includes a style, it will automatically be added to the Style list, and you will be able to use it in future with your own designs.
7 - Advanced settings.
8 - The Size option allows one to select a dimension preset for the AI generated image.
9 - Starts the image generation process. The number on the button indicates how many Render Coins are required to render with the current settings. The generation is possible only if you have enough Render Coins and the connection to the server.
10 - Displays the prompt, seed and other settings used to generate a selected sample.
11 - Zoom in or out.
12 - The preview of the current sample.
13 - Thumbnails of the generated samples. Click on one to preview the corresponding sample.
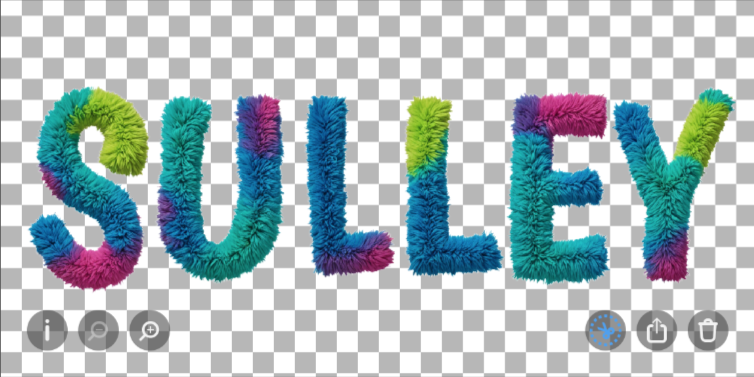
14 - Remove the background. When this option is activated, the app makes the background areas of the current sample transparent.
15 - Export or share the current sample. This button opens a menu where you can choose to save the generated image as a file, copy it to the Clipboard or use one of the Share options provided by the operating system. The Send to Document command adds the image to your original design. It will be placed either on top of the selected layer or above everything if nothing is selected in the document.
16 - Delete the current sample.
Advanced Settings
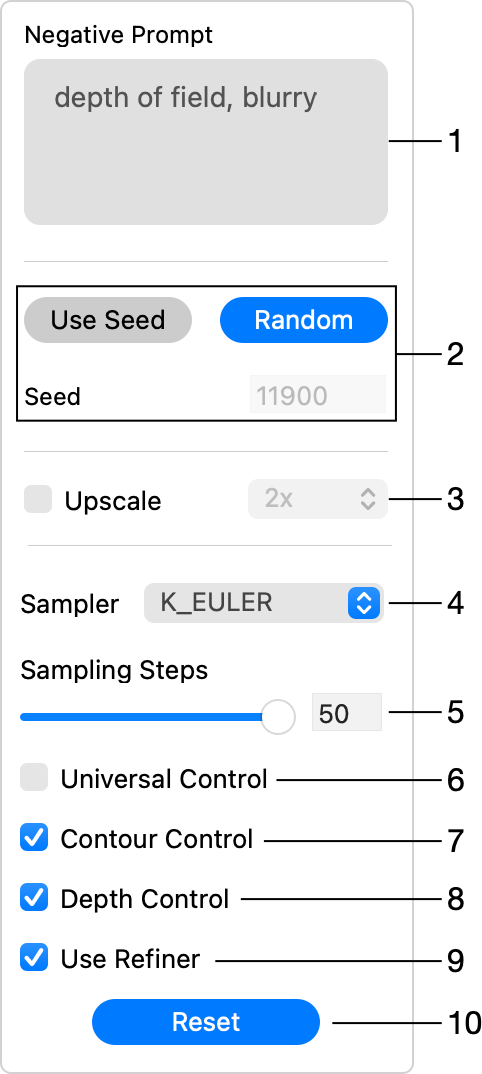
1 - The Negative Prompt describes properties that you don't want to have in the generated image. It can be left empty. Example: dull, matte, desaturated.
2 - The Seed is a random number that initializes the image generation process. The Seed can be also set manually. You can copy the Seed from a previously generated image if you want a new image to look like it.
3 - Upscales the current image dimensions. Enabling this option costs an extra render coin.
4 - The Universal Control activates the image segmentation. The AI basically tries to define areas in the input image (individual objects like a flower or letter) in order to fill those with proper details. This mode works well in most cases and should be preferred to the Contour Control or Depth Control. In this mode, an input image with less details can still give a good result.
5 - The Contour Control makes the AI find contours in the input image and use those to create the output. This mode works well with "flat" images containing many small details such as a texture. The model tries to preserve those details in the output.
6 - The Depth Control option is often used with input images that have details which are distinctly closer to the viewer than the others. For example, flowers in front and leaves far in the background. With the Depth Control activated, the AI creates a depth map in order to preserve the feel of different distances to the objects.
7 - Restores the default settings.